Sunday, December 30, 2012

Bread - Number Nine

Bread - Number Nine: Climbing out of the single digits with total whole grain
100 percent whole wheat

Dedicated to the permeating, homey, wafting aroma of baking bread. Should have had an open house today it smelled so good.

Experimented with 100 percent whole grain and with longer rising and baking times. That is the luxury of a stay-at-home vacation. May never travel anywhere again, so nice it is to let the dough rise for as long as it needs, to have a leisurely breakfast after mixing dough, to read the newspaper when waiting for whatever is the next step, and to spend hours painting that table that has been patiently waiting, though eyeing me with the indictment of its unpainted presence. 

Missed Brad's Sunday visit and bread tasting as he is off on exciting international vacation, but did heed his advice to take photographs and bask in the glow of rising dough and crunchy crusts.

Not accepting as a sign from Jesus the fact that my bread slash designs are uniformly resulting in crosses at the top of the breads. But a liberal, socially conscious rabbi/carpenter would approve of bread making, perhaps telling me to add some volunteer work to my days. 

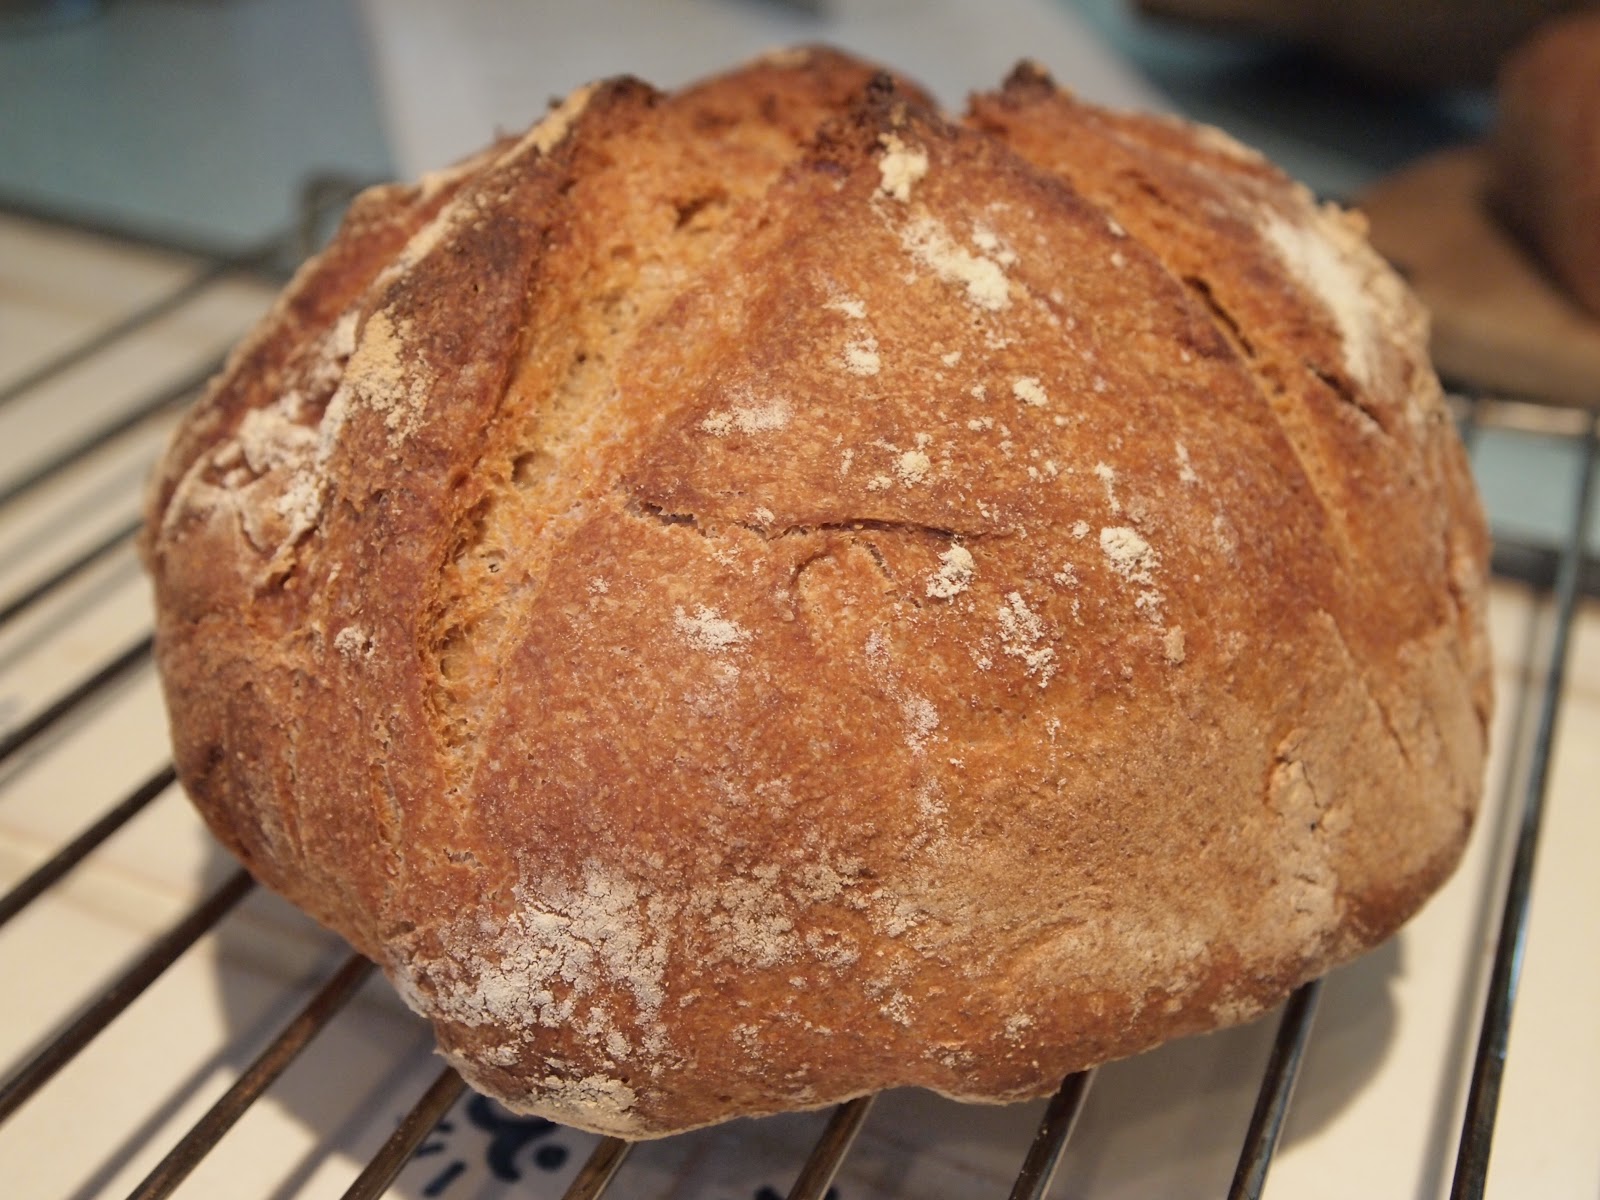
[Close up of Bread Number Nine and its cross on the top.]

Ingredients
3 cups white whole wheat flour
1 1/2 tsp salt
1/4 tsp yeast
1 1/2 cups lukewarm, purified water
Optional: small ball - maybe 1 inch diameter - previous batch of dough (Actually used the dough from this bread for my next dough, which was a mostly white flour mix with one third whole wheat.)

Instructions
1. If using the small ball of previous batch of dough, take the previous batch's bowl, with small ball of previous dough, and add lukewarm water. Mix in whatever old dough is on the sides and chop up small ball of dough. Do not mix. Let sit for five minutes. 

Using a bit of the previous batch of dough makes for a lazy sourdough and gives the bread a little more depth of taste. Convenient and less washing up when making a new batch when just starting to prepare the previous batch for rising and baking.

2. Mix dry ingredients. Add water.

3. If using the small amount of previous batch of dough, now take out immersion blender and mix well the water/old dough mix.

4. Dump dry ingredients into bowl of wet ingredients. Mix well. Mix and mix. Though there is plenty of water, it quickly absorbs the flour mix. Keep going and get wet hands in there if necessary to mix all of the flour mix into the liquid for a cohesive dough.

5. Cover bowl loosely with plastic. Better if set in a warm place. That is not always possible; do not fret. Good bread will result either way.

6. Let the bowl sit out for 12 to 18 hours. Let mine sit for 18 because the kitchen was quite cool, there was no place to rush off too, and it is good to experiment. Heated kitchen for the final two hours of rise. Not sure if that made any difference.

7. When dough is risen (just rely on experience or guess), either prepare it for baking or place in refrigerator - with plastic still loosely covering the bowl. Only differences are  that unrefrigerated dough will be stickier to work with and will only need about a half hour to forty minute second rise.

8. Take out bowl from fridge and remove plastic. Lightly flour the top. 

[Dough from another bread - mix of bread flour and white whole wheat - risen about three hours.]

9. Lightly flour a board and flatten the dough, stretching a bit. Fold in thirds, like an envelope, then fold in half. If, like me, you do not find the shape pleasing, or it is weird in some way, just work a bit more. Do not knead.

10. Leave dough on board and loosely cover with plastic for 15 minutes.

11. Take out a clean bowl, flour the bottom and lower part of sides. Put dough in bowl for final rise of 90 minutes (less if using unrefrigerated dough). It is suggested to put the bottom right side up, but this is not crucial and can be remedied later. Lightly sprinkle top with flour. Cover bowl with a kitchen towel or loosely cover with plastic.

12. Place top of la cloche in oven on baking stone. Preheat oven at least 45 minutes ahead of baking to 500 degrees.

[Same dough as previous photograph, this time after rising for five hours.]

13. Now for the part that makes one feel like an expert. Take dough and either do a final shaping (not suggested, but mine turn out fine) or dump onto well-floured baking peel. Do decisive, one-stroke slash about 1/4 inch into dough. Do a second or third time, depending on what design is preferred.

14. Open oven, remove top of la cloche, and slide dough onto baking stone. Cover dough quickly with top of la cloche. Close oven. Leave for 30 minutes approximately. Left mine for 32 as my breads have seemed to need more time.

15. After 30 minutes or so, reduce oven heat to 450 degrees and remove top of la cloche.

16. Leave bread in for 15 to 20 minutes uncovered, then remove. Checked mine at two-minute intervals after 13 minutes and it needed 19. Wanted to err on the side or more time because have had the sneaking suspicion that some of my breads were a touch underdone. Place bread on top of stove or on a rack to cool for two hours.

17. Tell person watching television to turn off, pause or mute whatever is being watched so that beautiful bread's quiet crackling can be heard and appreciated.

And, two hours later, taste. Nice crunchy crust, brown, slightly burnt right at the top. Light, yummy, interior, with not as many airholes - crumb - as a bread with white flour. Delicious and good to know that a 100 percent whole wheat, albeit a so-called white whole wheat, can turn out sufficiently well to automatically be a wonderful everyday bread.

[One last look before eating.]

Friday, December 21, 2012

Why Bread?

Why not cupcakes? Why not cakes or biscotti or scones or muffins?
Why bread?
It's so ordinary. Somewhat limited, eschewing fruits and nuts, icing, confectioner's sugar. 

Bread isn't pretty in a decorated way.
It is appreciated from the inside out.
Looks matter, undeniably, but taste counts more.
Craggy, brown, unplanned designs are beautiful.
Surprises are welcome (sometimes).

Starters, even doughs, improve with age.
Totally obvious metaphor.

We cannot live by bread alone, but we need the bread.
Why not make something ordinary special?
Why not see the special in something so ordinary?

My rationalizations for bread journey.

Now isn't this a pretty bread? 


Thursday, December 20, 2012

Why 108?

108 is a multiple of 18, with both personal significance and importance in Judaism because it means life.

108 is an important number in Eastern religions, the true source of information being the wikipedia page about 108, at least for someone with extremely scant knowledge. 

108 even has a special place in math, for a few reasons (yes, also learned about this on the aforementioned wikipedia page), not the least of which is that it equals (1 x 1) (2 x 2) (3 x 3 x 3).

  1. Remember those math rules about order of operations when there are parentheses. Inside out.
  2. Would have used proper exponential symbols, but they are unavailable on this blogging platform.

A major league baseball has 108 stitches. Might as well read that wikipedia page about 108 because there's more. One could say that I am just a late arrival to the 108 bandwagon.

Size matters

So be it. I also like 108 because it is a large number, at least in terms of making breads. It is a number big enough that I will not be completing my project within the year - it is more than two breads per week; it's timeline is then uncertain, and not rushed. 

This is about leaving one's comfort zone and discovering new methods, new recipes, new tastes, and purchasing new books and some kitchen doodads. 

This is about delving deeply into one ordinary part of life.

108 is a goal that I would never reach had I not chosen a number.

Sunday, December 16, 2012

Bread - Number Eight

Bread - Number Eight: Mostly White Whole Wheat
Unexpected Baking

Dedicated to my younger daughter and my husband, who saw no reason for a holiday season pause in wonderful homemade bread. Indeed, my daughter is asking for sourdoughs.

Ingredients
1 cup bread flour
2 cups white whole wheat flour
1/4 to 1/2 tsp yeast
1 1/2 cups purified water (use filtered water)

Instructions
During a break from preparing for the annual Chanukah family get together of making an apple crisp, which did not turn out well, latkes, which were just right, contributing to the deviled egg taste testing, and a salmon dish, which cannot go wrong when the fish is fresh, mixed together the bread dough. Either this process is becoming sufficiently routine to do while busy with other things, or I am somewhat distracted person, or both. 

Mix the dry ingredients and add water. Mix well. Cover loosely with plastic for 12 to 18 hours. With this amount of flour, mixing takes about three or four minutes. Indeed, could mix a little more, but still easy to do with a busy day in the kitchen happening all around.

Let my dough sit for 15 1/2 hours. Seemed to have flattened out. Should research this a bit as completely ignorant about what dough should look like at point when the first rise should end. 

Put in the refrigerator, but took out soon after to prepare for baking.Could probably last in fridge for five days. Or, can bake right away, though even an hour in the fridge will make the dough easier to handle.

Baking preparation
When ready to bake, leave at least an hour and a half for preparation.

Prepare board with flour and lightly dust top and sides of dough, as well as hands. Stretch dough on board in as much of a rectangle as possible (think 8 1/2 by 11 sheet of paper) and then do a tri-partite envelope fold. After, fold in the other direction in half. Cover loosely with plastic. Let sit for 15 minutes.

At this point, let sit in a bowl, proofing basket (which has not moved, and might not move, from my wish list to my kitchen), or on a kitchen towel. Make sure any receptacle the dough is placed in or on is well floured, perhaps even spraying a layer of non-stick spray first. This time, used a wooden bowl with non-stick spray and rice flour, which supposedly is more absorbent than regular flour, but did not seem to make any perceptible difference.

Let sit, covered with a kitchen towel, for 60 to 90 minutes. Make sure to preheat oven to 500 degrees at least 30 minutes prior to placing dough in oven. Place baking stone and top of la cloche in oven. My dough seemed ready at 72 minutes. Had risen and just had that plump look. 

Can dump dough onto heated baking stone; or dump onto well-floured baking peel, make a little design on top with a knife or razor, and slide onto baking stone. My dough dented a little when transferring from the peel to the baking stone. Cover with top of la cloche. 

After 30 minutes, reduce heat to 450 and take off top of la cloche. Heat for another 15 minutes. Take beautiful bread out of the oven. Make sure kitchen is quiet. Listen next to bread for little crackling sounds. Leave out on rack or on top of stove (unheated, of course) for two hours before eating. 

[Top of la cloche.]

[Baking peel with a bit of rice flour. Easy to imagine using that tool with a large wood-fired oven.]

Taste?
All agree this is a really, really good bread. Crust excellent. The mix of two-thirds white whole wheat flour to one third bread flour tastes more like a whole wheat than the mix with one-third regular whole wheat flour. All in all, though, a similar taste. Rose well in the oven also. Nice crumb. Should take a picture, but wondering if the first rise was overdone at over 15 hours (kitchen was somewhat warm) and whether crumb could have been a little airier - or whether with a majority whole wheat dough, this is maximum lightness possible.

[Notice the lovely design on top created by the one-motion slice into the dough.]

One can see that probably a bit too generous there with dusting the dough with flour as it appears rather thick on top of the crust. Absolutely no matter; tastes wonderful and adds to the character of the appearance.

Will have to start bread number nine at once as half this bread disappearing quickly.


Friday, December 14, 2012

Bread - Number Seven

Bread - Number Seven: All spelt with honey

Dedicated to farmers markets, delis, supermarkets, and the farmers who provide the plentiful food that we take so for granted that we can obsess on organic, artisan and other categories we would never consider were we hungry.

This recipe is adjusted for store-bought yeast from the breadtopia sourdough yeast recipe. On the recipe webpage are 15 minutes worth of instructional video to guide one through the process.

Ingredients
4 3/4 cups spelt flour (that was the end of the bag)
1 1/2 tsp kosher salt
1 3/4 cups water (add 1 1/2 and determine how much more to add depending on consistency)
1/4 tsp yeast (instead of the 1/4 cup sourdough starter in recipe)
3 tbsp honey

Instructions
Mix water and honey in a large bowl. Let sit and mix dry ingredients in another bowl. Add mixed dry ingredients to large bowl with wet ingredients. Mix well. My dough was dry with 1 1/2 cups water and added another two ounces. Think it could have used a couple more.

Cover with plastic. Let sit for anywhere from 15 minutes to one hour intervals for three stretch and fold exercises. [Note: A sneaky way to be introduced to the concept of kneading.] For this bread, the timing was uneven so that one stretch and fold was done at 15 minutes just prior to dinner, one was performed a half hour later, and the next a half hour after that. That's what happens when fitting bread making into real life, or at least my particular real life.

Stretch and fold quite easy
How to do the stretch and fold? Hold the dough in the air and stretch similarly to a stretch on a board. Do not stretch to breaking. When stretched fold in thirds. Then turn around and do the same on the opposite side. If that's confusing, watch the first breadtopia video.  After the final stretch and fold, let sit on the counter for 12 hours. Remember to cover loosely with plastic. 

Okay, so it looked at 12 hours like it was fully risen, but not completely sure. The holes were ubiquitous, though smaller than in the whole wheat recipes. Mine rose very nicely. Put the dough in the refrigerator; probably good for four to five days. Made the bread two days later. 

Baking day
Almost confused the two batches of dough sitting in the fridge. Thankfully, they were slightly different shades of beige or else my husband might have taken the 100 percent spelt to the office holiday lunch. That would be wrong - and it did not happen. Disaster averted. (Not completely as managed to slightly burn his bread, though he was nice enough to not mention that.)

Take the spelt dough out of the fridge. Dust a board with flour and dust the top of the dough with flour. Indeed, dust wherever you want as remove dough with spatula from the bowl. Mine had actually become more wet and was pretty sticky. Needed a nice amount of flour.

Here is where my performance deviated from the recipe, most likely because it was late at night and escaped my mind that there was a different technique offered for this stage of the process. Mr. Iowa in the video never seems thus distracted. Mine is a less rational process. Also was distracted by mental activity of figuring out the logistics of baking husband's bread in the morning at the same time would be getting ready for work, which, from the previous paragraph one can tell went a bit off track.

Back to bread preparation
Stretch the flour on the board (will stretch to maybe eight by ten inches) and fold in thirds; then fold in half. Leave for 15 minutes covered loosely with plastic if dough seems wet. Put the dough in a well-floured bowl, covered with plastic, for 90 minutes. In recipe video, the guy does a thing that looks like making a bandana bag akin to Huck Finn, but with dough. 

Preheat the oven to 500 degrees. The recipe called for 450, but wanted to make sure oven was hot. Make sure la cloche and baking stone are in the oven to preheat as well. Actually, since husband was cooking, did not have the usual long preheat and it turned out fine. Put la cloche in an already hot oven and do not believe there were negative consequences. 

Next in a less-than-stellar preparation, after the 90 minutes, dumped dough; yes dumped; onto parchment paper on baking peel. Employed parchment paper because dough was wet. Took bread knife and made three cuts into the dough, across the top, somewhat like a star. Placed the dough-on-parchment onto the baking stone in the oven and covered with the la cloche, with which I have absolutely fallen in love. Immediately reduce heat to 450 degrees.

Gorgeous is not the word
At 30 minutes, remove top of la cloche. This was a deviation from the text of the breadtopia explanation. Also remove parchment from underneath the bread. Tends to rip at this point, so best to use the baking peel.

At 45 minutes, that's 15 minutes later for anyone with math difficulties, remove bread from oven. Mine was so exquisite, so absolutely what a country bread should look like, that with oven mitts on, holding the bread as one would a newborn straight out of the womb, carried the bread to my just-about-sleeping husband and said - here look at how amazing - the star had not quite made it, but a cross spanning the top of the bread had. He asked if this was a Jesus bread. 

Decided not to take the cross as a religious message; preferred to see the miracle that any design at all had materialized and so perfectly, though not as planned.

[Top of bread. There's the cross.]

Never bake late at night
Slept fitfully and almost not at all, so racing was my mind with my brilliant result (seduced by appearances), leading to the sub-par baking the next morning of my husband's bread. Sorry. 

Tasted the bread in the evening when returned home. It was good, solidly good, and liked the all-spelt taste, though wondered if it would be better without the honey. Was, however, a bit dry. Not sure if that was partly due to it being spelt. Need to experiment more, perhaps making a bread combining spelt and other whole grains; perhaps having 15 to 25 percent bread flour would do nicely.

And should have followed the explanation, which said good results from leaving the top of the la cloche on for the entire time. Might have been less dry. Definitely more than edible, just not perfect.

Results sufficiently promising for more spelt experiments. Also showed that la cloche not preheated performed just fine.


[Another view of the just-baked beauty.]

Effort worthwhile 
P.S. Two days later, my daughter came home from school. Without even mention of the new bread, when everyone was out at work, she found and sampled it and told me the bread tasted great, like a farmers market bread. Now that's a compliment.


Monday, December 10, 2012

Pause for Eight Observations: Anxieties, Obsessions

Observation #1 - Every time a new bread is attempted, assume it will fail. When it turns out well, feel so surprised.

Observation #2 - Still fear that each attempt will meet with failure, but care somewhat less that it will. Anxiety is being replaced with wonder that such loveliness is being created in my kitchen.

Observation #3 - Really love that one is not even supposed to clean the baking stone or the la cloche, merely wiping down or getting stuck bits off with a knife. Who said that primitive people were not advanced?

Observation #4 - Now that bread number five has been made about seven times, enjoying the utter joy of the sight of the beautiful bread and the sweet sound of the crackling as it comes out of the oven. The crackling can only be appreciated because of the lack noise. It is the sound of an empty nest.


Bread Number Five dough rising in a pretty bowl. Notice the places where it seems like the dough is being inflated and stretched. 

Observation #5 - Buying books on bread baking can be dangerous, causing one to lose sleep by staying up late into the night reading about recipes, techniques and crazy people who eschew commercial yeast and grind their own flours.

Observation #6 - May well be turning into crazy person mentioned above.

Observation #7 - In addition to the names of 10 bread books jotted down, the many websites, videos and discussion forums available render it possible to become and stay obsessed.

Observation #8 - Wish list blossoms as does realization that incredible breads are being produced without the items appearing on the list.

Sunday, December 9, 2012

Bread - Number Six

Bread - Number Six: Spelt Flour with Yogurt 

Dedicated to my sister, who gave me the recipe for my first bread, which I still make often, and think of us both making it when I prepare the dough.

Adjusted olive spelt recipe from the Healthy Bread in Five Minutes a Day book. Photographs of this bread are below.

Purchases
The Art of Baking with Natural Yeast $20 
Barnes and Noble membership $25 - purchased as held onto a list of about 10 bread books that could well be purchased over the next year.
(Do not wish to have bread books on a tablet or other device because sometimes open a few at a time when contemplating recipes.)

Ingredients
2 cups spelt flour 
1 cup bread flour 
1 1/2 tsp salt
1/4 to 1/2 tsp yeast
1 cup plain whole milk yogurt (prefer with the fat)
1 cup water
Note: Left out from the recipe the 1/4 cup vital wheat gluten and the 1 cup olives. Also adjusted yeast and baking instructions.

Instructions 
1.  Mix dry ingredients well.

2. Mix in yogurt. Prefer whole milk rather than nonfat. 

3. Mix well to get all of the flour. Mixing is easy as the dough is wet.

4. Cover loosely with plastic. Leave out for 12 to 18 hours. See if dough has risen and has some small bubble-like holes formed. Left mine out for 15 hours in a cool kitchen. Warmer the kitchen, the less time the dough will need.

5. Next day the dough was still wet and added a little whole wheat flour. 

6. Spread flour onto a board or countertop and cover dough with a thin layer of flour. Put dough on board and flatten gently. Fold in three parts as if putting a large piece piece of paper in an envelope. Fold in half. Let sit for 15 minutes. 

7. Though recipes say to cover loosely with plastic to prevent drying out, this dough needed some dehydrating, so left it uncovered.

8. In large bowl. spray non-cook spray and cover with nice layer of flour. Place dough in bowl and let sit for 60 to 90 minutes. Will not rise much. Again, skipped the loose plastic or kitchen towel to cover. Wanted the dough to dry out as much as possible as it remained quite wet.

9. At one half to one hour before baking, put top of la cloche in oven on top of baking stone (my baking stone remains in the oven 95 percent of the time). Let them stay in oven as it gets hot. Preheat the oven to 500 degrees.

10. With still wet dough, added a little more whole wheat and shaped into a boule. Cut slashes into dough with bread knife. No movement is necessary. Just cut into dough about 1/4 to 1/2 inch in one motion. Do not slide knife as if cutting a slice of bread. This is literally a single motion of putting the knife sufficiently into the dough. (If this does not work, eat a tasty bread and try this again with another one.)

11. Put dough onto parchment paper (instead of directly onto baking stone) because it was wet and had little confidence it would fall onto baking stone without great mess. Placed dough-on-parchment-paper onto baking stone and covered with la cloche top. Left in at 500 degrees for 20 minutes.

12. Reduced heat to 450 degrees and left dough - with la cloche top on - for 15 minutes.

13. Removed la cloche top and left dough in oven for another 10 minutes.

14. Take that beautiful bread out of the oven. Mine was crackling, a lovely sound in a quiet and warm kitchen. Immediately ran out to farmer's market with a smile. 

Christmas music playing
Maybe it's the cheesey Christmas music playing or the fact that family will be visiting soon, but there is confidence building with each bread. 

And how does this spelt beauty taste? Very nice indeed. My husband and Brad enjoyed it. It crackled when first cut. Ate so much, need to make another bread dough for the week. Here's how the spelt beauty looks inside and out.


Look at those wonderful holes. And the crust? Marvelous. 


Thursday, December 6, 2012

Bread – Number Five – Part Two

Bread – Number Five – A second batch with minor variations. Like a concerto, but different. 

Dedicated to the la cloche, a miracle tool. Same recipe as bread number five.
 
Ingredients
2 cups bread flour
1 cup whole wheat flour (Used same proportions as breadtopia recipe used in bread number five)
between ¼ tsp. and ½ tsp. instant yeast (Up from ¼ tsp.)
1 1/2 tsp. salt
1 1/2 cups purified or spring water (Used filtered tap water because the first batch of Bread Number Five came out fine, indeed, wonderful, with it.)


Variation on Bread - Number Five - Part One 
This time using just a little more yeast for a guaranteed 12-hour rise and the same ingredients otherwise. Instead of making the bread after the dough is ready, will be storing it in the refrigerator for a day or two. Will be dividing the recipe into two batches as well because the first batch made such a large bread.

Also going to try using the top of the la cloche, the bell part, on the baking stone.

Instructions
1.  Mix dry, then wet ingredients. Cover bowl with plastic. Let dough rise overnight for 12 hours.

2.  Put in fridge during workday. Return home and take dough out of fridge. Easier to work with because not quite as warm and wet. Cut dough in half with shears, so cool, to make two small breads out of this batch.

3.  Put well-floured half of dough batch on well-floured wooden board with well-floured hands. Very easy because not as sticky as unrefrigerated previous batch. Flatten into approximate rectangle. Fold in tri-part envelope configuration and then in half. Cover loosely with plastic for 15 minutes.

4. Lay out well-floured kitchen towel. Put dough on towel and cover dough with rest of the towel as if inside a tri-partite envelope. Or, keep dough on well-floured board and cover with well-floured towel. Either way works fine.

5. Let sit for an hour to 90 minutes. Preheat oven to 500 degrees at least a half hour before placing dough in oven. Or, like me, dinner is taking up oven space prior to bread baking. So, make something that needs oven heat as close to 500 degrees as possible. This way, minimal time will be needed to bring the oven up to 500. After all, one may have foods to prepare other than bread, though that is apt to become an obsession.

6. Reminder: At 60 to 90 minutes beforehand, get oven well heated to 500 degrees. When oven and dough are ready, place dough onto baking stone and cover with top of la cloche. (Did not quite drop from the floured towel, but managed to keep its shape as eased the dough off and into 500-degree oven and onto hot baking stone.) Actually, the dough is really dropped onto the baking stone, which is much easier than employing the bottom of the la cloche; this way the top just goes wherever on the stone the dough happens to fall, or has been carefully placed, whichever best describes one's practice.

7. Baking time according to size of the dough. With dough half the size of the last batch, bake at 500 degrees for 22 minutes; remove top of la cloche and reduce temperature to 450 degrees for 13 minutes.

8. Admire the beautiful bread when removing it from the oven. Looking good.

[Restaurant in San Francisco that must be named for development in Brooklyn in Coney Island.]
 
Perfect breakfast
Amazing. Genius. And tasty. Relished the deliciousness of the bread with a little butter and tea for a simple breakfast. Divine.

In the evening, made the last half batch. This time it was easy as it was the third time through the process. Skipped the recommended folding because the half batch of bread made last night came out a little too spherical. Want a somewhat more pleasing shape – less soccer ball, more the top of a football. Nice part of the repeat performance is how much faster the process goes and with much less trepidation. A bit of a confidence boost, really.

Indeed, did not even do the entire wrap-in-a-kitchen-towel step and instead left the dough on the cutting board and covered with a well-floured towel. Really, what is the big reason for moving the dough unless one possesses an impressive proofing basket? (Hope not to receive my comeuppance with that comment.) Also convinced that placing the top of la cloche on the baking stone instead of the bottom of the la cloche works miracles as bottom of la cloche requires way better aim than I possess while handling sticky dough in a kitchen towel as entire body is suddenly confronted with open oven’s 500-degree heat. The baking stone makes for a very wide and generous target, with the bell-shaped la cloche fitting wherever the dough happens to land.

Another wonderful bread. Feel proud.

P.S. Have now made this bread yet again and comes out perfectly. Very easy and dough lasts at least a few days in the fridge after the 12+ hours first rise.

Visions of something other than sugar plums dance in my head

Of course, however, mind rushing to possible next steps. Already in pantry is the spelt flour. Visions of cold mid-winter Sundays with various sourdough starters on the dining room table like a third-grader’s science fair experiment in progress. On the horizon, videos to watch that demonstrate step-by-step kneading and rising.

[Pacific Ocean]


Monday, December 3, 2012

Bread - Number Five

Bread – Number Five: La Cloche

Written with a French accent.

Dedicated to my husband, who always support purchases that result in delicious bread.

Puchases
La Cloche $57 (bread making is addictive, though less expensive than other addictions).
Using another no-knead recipe, this time from the Breadtopia website, which provides a link to La Cloche purchasing possibilities and inspiring videos sporting an Iowa gentleman bread maker. The recipe and instructions are from Breadtopia.com, the basic no-knead recipe and the video on the recipe webpage. 

Ingredients
2 cups bread flour
1 cup whole wheat flour (Used same proportions as the above video: 1 cup whole wheat flour and 2 cups)
1/4 tsp. instant yeast
1 1/2 tsp. salt
1 1/2 cups purified or spring water (Used filtered tap water because had not bothered to read the recipe before early morning bread making while still in bathrobe)


Feel like a sell out with majority regular bread flour and only one third whole wheat.  Want to see how much lighter it is and, perhaps, generate a special-occasion bread. Yes, rationalizing.

Instructions
1.      Mix dry ingredients. Add water. Mix well.

2.      Cover with plastic and let sit to rise for 12 to 18 hours depending on the temperature of the room. Cooler rooms will require longer rising times. This time, made sure the kitchen was warm and stopped at 12 hours. 

3.      Cover a cutting board or flat surface with a generous layer of flour. Regular or whole wheat, cornmeal, or similar meal or flour will do fine. Cover the top of the dough in a sprinkled layer of flour. Rub a good bit of flour onto your hands.

4.      Keep flour right at your side. You will need it. Use a spatula and the flour to separate the wet dough from the bowl. We will see how this works out, but my choice was to use a nice amount of flour any time the wetness of the dough became an obstacle to anything.

5.      Put the dough on the well-floured cutting board or other surface. Spread out without pressing or kneading. Mine was about seven by eleven inches, though not a perfect rectangle by any means, and maybe about an inch thick.

6.      Fold the dough in thirds as if folding an old-fashioned aerogramme or a piece of paperto fit into an envelope. Then rotate once and fold in half. Video does a wonderful demonstration of the folding.

7.      Let the folded dough sit for 15 minutes. Cover loosely with plastic.

8.      If you have a proofing basket use it. Grease first, then put flour, cornmeal or something similar to prevent sticking with the wet dough. If not, use an oiled and then well-floured bowl or a floured kitchen towel (that’s my choice). Cover with a kitchen towel, or, in the case of using a kitchen towel, just fold it over the dough. Wait one hour to 90 minutes. Wait! Do not leave the room.

9.     Put on a timer or immediately preheat oven – but make sure oven is well heated before baking time, a half hour to an hour before. Preheat oven to 500 degrees. Yes, 500. (This number is anxiety inducing as my pampered oven has never experienced such high temperatures, and frankly, not sure the appliance is up to the task.) Hoping that my oven does not die and that no one dies or gets burned when handling the top of the 500-degree la cloche or when dumping the dough into it.
[Bungalows in Kansas City.]

La Cloche - and related anxieties
For those of you who did not take high school French, la cloche means bell, and yes, it is shaped like one. Basically, this clay contraption that looks like a wide and much smaller Liberty Bell (sans the Liberty Bell inscription). The idea is to create a bread oven within a conventional oven. Major advantage is that no water or ice is necessary to create steam in the oven, or accidentally crack oven glass. Major disadvantage, and this is said before the first use, is that a 500-degree piece of clay (not heavy) has to be lifted before placing dough inside the bottom. Oiled it for the first use with olive oil. Though other oils were recommended, and olive oil specifically mentioned as something to avoid (that is on one of the many websites and discussion boards with la cloche information; seems there is a la cloche community out there), used it anyway because love olive oil and it was the only oil in the house. So, getting back to the la cloche, the bell shaped mini-oven lets the moisture from the dough fill up the small space so that the baking bread receives the correct amount of steam to bake well, critical to “oven spring,” the rising in the oven that gives that lightness to the interior of the bread.

That is the theory. Right now, the dough is sitting and rising on a kitchen towel. Wondering whether should have refrigerated the dough until the morning as the thought of late-night handling of the hot la cloche is making me ever more nervous. The kitchen is wonderfully warm, more comfortable than the cool rooms elsewhere in the house.

How convenience oriented our ancestors were
There is something ancient about the la cloche, similar to the baking stone, in that they are porous and made out of materials that one would sooner find in a medieval town than in a modern kitchen. Indeed, one is expressly warned against using soap of any kind to clean them as that will seep in and ruin the next few foods baked on or inside them. Use water, a brush, or knife for difficult spots. Yes, they were used throughout the world in one form or another, and still are, but if you want one in 2012 United States, they cost more than a peasant somewhere would pay. But these are of a class of goods that one buys and keeps forever. Amortized even for the few years employing the baking stone, we are probably at about 50 cents per bread.

Waited only an hour and a quarter. The bread rose and the kitchen was warm. How could it not be with a burning 500-degree oven? It was toasty and with the la cloche as the assistant in this process, it felt like a wintertime French hearth pre-revolution, during one of the times when scarcity was not a problem.

[Roman Baths in Bath, England. Wish I could beam myself there for bread making classes.]
Instructions continued
10.   Wear oven mitts! Open oven, take off top of la cloche and dump in dough. Perhaps one should aim for the middle of the bottom of the la cloche. My aim, not so good;, dough leaning on the side. Maybe using the top of the la cloche over the baking stone would have been the better way to go, as this is an option. In that case, perfect aim would not be necessary.

11.   Set timer for 30 minutes.

12.   At 30 minutes, take off top of la cloche, close oven door, and reduce heat to 450 degrees. Bake for another 15 minutes.

13.   At 15 minutes, if the bread looks done, remove bottom of la cloche from oven with bread. Remember that each oven is different and baking times vary. My bread was definitely done, the crust a dark, deep brown, with some scattered burnt black spots.

14.   Let the bread stand for a couple of hours.

Baking and hearing the Jeopardy music in my head
Good thing about the la cloche is that peaking is impossible. The clay is opaque.

15 minutes in oven: The kitchen smells like bread, almost entirely masking the previous strong scent of the olive oil that permeated the kitchen during the pre-heating.

30 minutes in oven:  Removed top of la cloche and looking good.  Bake for another 15 minutes.

Waiting and looking at the “store” at Breadtopia. G-d forbid, ever up at three in the morning and that stuff is on an infomercial. It is possible proofing baskets, boards and other paraphernalia would be purchased in mass quantities.

45 minutes: Now that is a bread any peasant or shtel dweller would recognize. Took the bottom of la cloche out of the oven. Bread slid right out with a spatula. No problema aqui. Put the bread on a rack, where it is making lovely crackling noises.

Time for sleep – will taste it in the morning.

9 a.m. of the next day – SUBLIME
OMG, have made the perfect bread. Crunchy crust that is not hard, a wonderfully light interior with beautiful wholes in the crumb, a great taste, and an impressed husband. This is bread any bakery would be proud of. This is bread I’ve paid for. I stare lovingly at the la cloche.

This made a pretty large bread. Can make half of the dough or store half. Still he is a beauty - big, strapping, crusty and gentle on the inside – really a Gary Cooper of breads.

[No Gary Cooper photo here due to ambiguity of copyright laws and not willing to investigate copyright renewal of any particular Gary Cooper photo.]
[The Eye in London.]

Remember, though, that Bread Number Five is two thirds regular bread flour and only one third whole wheat. That ratio and the type of flours will have to be juggled for better fitting the goal of good daily, healthy breads. As a special occasion bread – for having company or bringing a bread to someone else – this will be perfect.
Wish List

Wish list of baking tools is growing. After all, if Breadtopia was correct about the la cloche, then perhaps that cute Danish whisk featured in its video is not far behind. And there is a bread book page on the website.

P.S. Perhaps it helped not to add the vital wheat gluten. Maybe that ingredient was the source of the little bit of aftertaste in the previous breads. Also could not hurt that this bread was two thirds white bread flour.