Showing posts with label Basic. Show all posts

Thursday, November 21, 2013

Bread - Number 38: Oh Yes, Now I Get the White Bread Thing

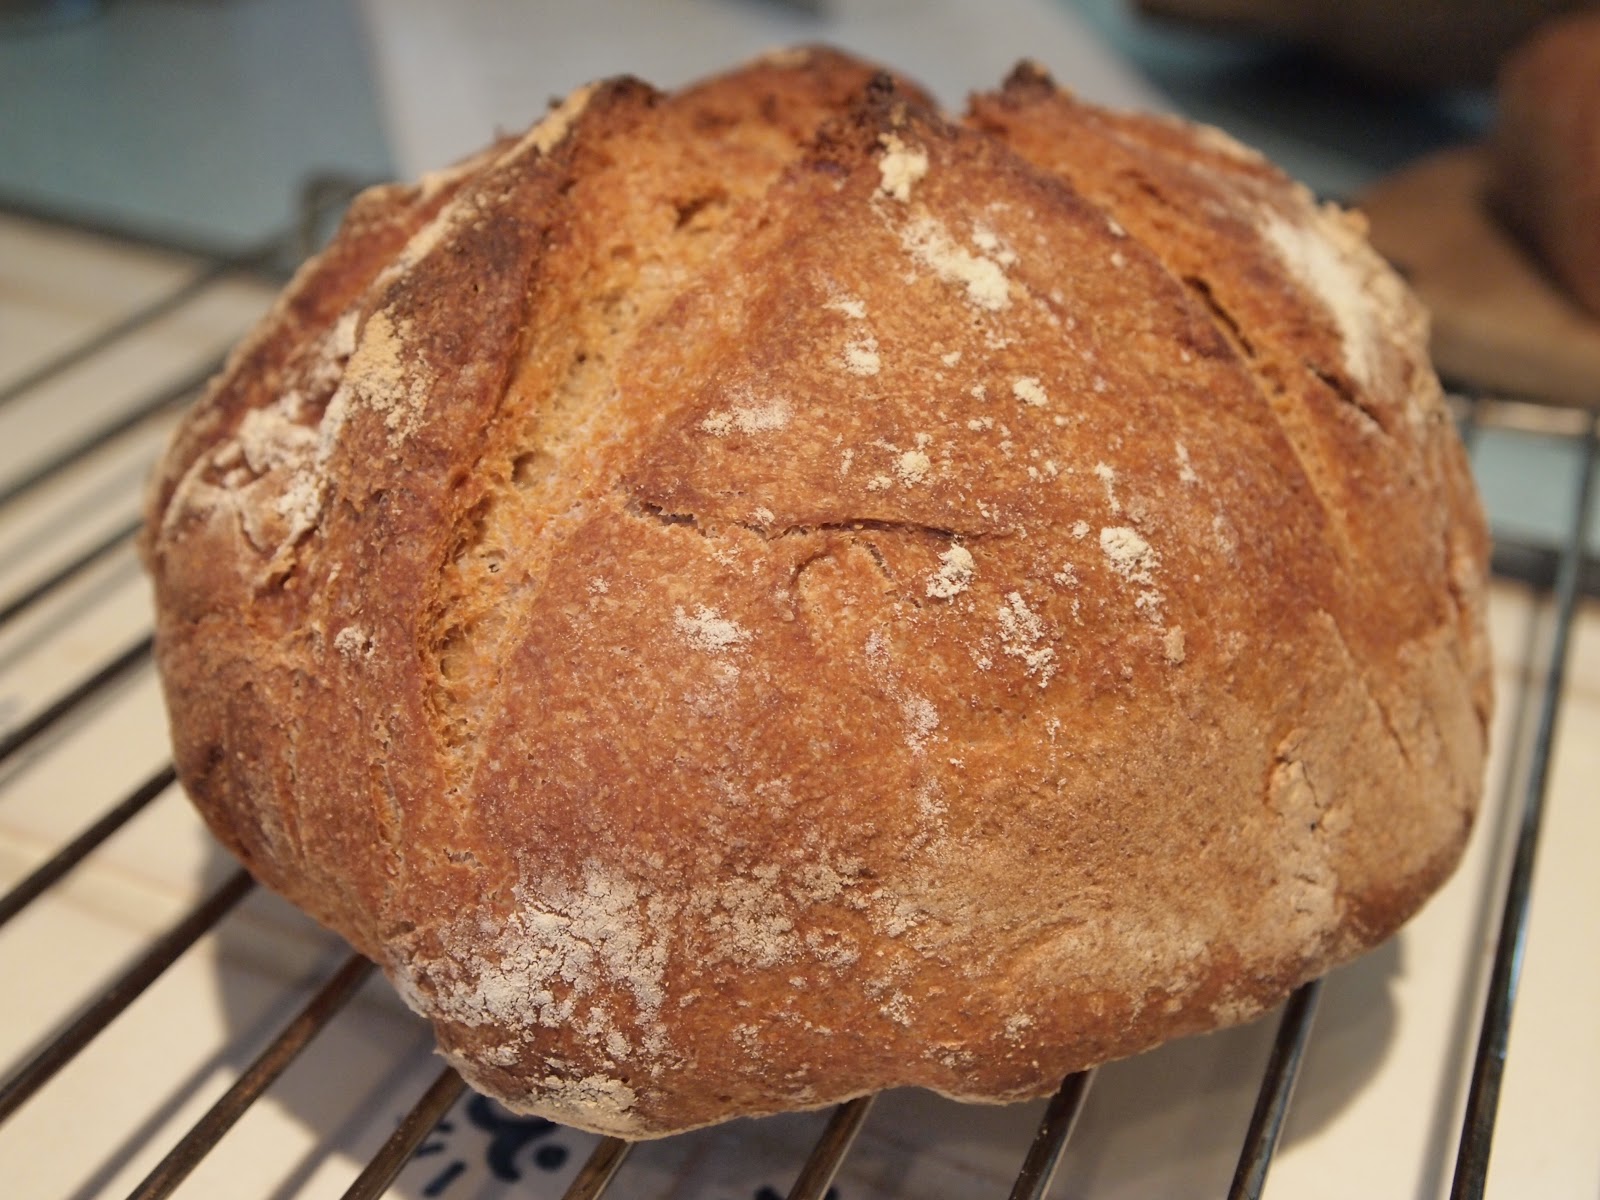
Bread - Number 38: It does not get better than this. 

Making a white bread is like becoming a drug addict; there's an easy equation between use of an ingredient and the results. (I have no personal experience with drug abuse and I mean no disrespect to those who suffer with this situation.) I have already made this bread four times. It is foolproof, easy (bears repeating), and rewards one's efforts way too well, as if drawing one into a secret cult. This is also a bread in which everything can be done in the evening, with the exception of taking out or putting the dough into the refridgerator. See? Perfection.

I got the dough recipe from a member of the freshloaf online forum. It is called Midweek sourdough, double retardation. Thank you to the author and if ever you are here in D.C., please let me know and I will have you over for bread and tea. I would even buy some fine coffee for you, though I don't keep any in the house. [Note that I probably could get the dough to rise a little better, as the photo demonstrates.]

Finally becoming 13
So why do I need such convenient dough? I am becoming a more engaged Jew - seriously. I am in the midst of an adult bat mitzvah class and learning to chant the prayers and to read from the Torah. We also learn about Jewish practice and philosophy, though I am familar with these already. Yes, this is an ancient rite of passage of sorts, although for 13-year-old boys. When girls were added, mainly in the sixties and seventies, my synagogue did not shift with the times. I was the only girl of my year to attend Hebrew school and I felt fortunate that I did not have to undergo the rigorous training for a bat mitzvah or be called upon to chant and lead services in public, as my own daughters did. I am filled with anxiety and using my nervous energy to practice each day.

So now , each night I am sitting in bed reading my Torah portion (the last one of Behar, for anyone who is interested) and listening online in the morning and evening to my rabbi's chanting of the part of the service I will lead. This is quite the challenge. I attend services regularly (since my father passed away) and attended regularly when I was a child. The synagogue Shabbat service is when I feel his presence. When I hear the congregation chant in Hebrew that the ways of the Torah are pleasent and a path to peace, he is beside me.

For any atheists or others whose eyebrows are raised, I was one of you. Maybe I still am as I my idea of God is more natural than all-powerful Santa Claus. Now I believe that the world would be a better place were everyone to pray for peace with friends at least once a week. I feel centered in that Sanctuary. What could possibly be wrong with that?

The ideal easy recipe - with a sponge

Ingredients
For the sponge:
100g starter
200g water
200g white bread flour

For the dough:
100g water
300g bread flour
10g salt

Instructions
Day 1: Mix together the sponge ingredients. Cover. Put in the refridgerator.

Day 2: Take the sponge out of the fridge. Let sit on the counter for the entire work day. Come home to a beautiful sight, a most active, bubbly sponge. (See, that white bread is not yet a dough and it is already pulling you in. Notice the enthusiastic bubbles, practically emerging and popping before your eyes.)

When you return home in the early evening, admire that lovely, bubbly sponge, then mix it together with the other ingredients to make the dough. No kneading. Just four stretch and folds, about 15 minutes apart. This hour of a total of five minutes of work, if that. Put the dough - covered - in the fridge.

Baking
Day 3: Nothing to do in the morning. Upon returning home from work in the evening, preheat the oven to 445 degrees. I heat up the baking stone and the top of the la cloche. Keep the dough in the fridge.

See? Still easy.

A minute before baking, take the dough out of the fridge and shape. Take a moment to ooh and ah over the conspicuous, incredible rise before shaping. Put the shaped dough directly in the oven. Cover with the top of the la cloche or otherwise inject steam into the oven. Keep covered for 20 minutes.

At 20 minutes, remove top of la cloche. Gasp audibly when your eyes witness the fantastic oven spring that has taken place.

Bake for another 20 to 28 minutes.

Take out of the oven a beautiful bread that in the next few minutes will make such fine crackling sounds that you might squeal or yell out the way Beatles fans did at Shea Stadium when they played in New York.

White taste too fine
And so good. It's sinful how good a white bread can taste. I have made this bread another four times, each time with as wonderful results as the first try.

Please pull me back to the light and goodness of whole grain breads. Now I know the temptation of white bread. I have seen the dark side or the white side, as the case may be.

Thursday, August 22, 2013

Ode to My Starter - and How to Produce a Fantastic One

Okay, perhaps this is not an ode. Maybe a thank you note to my starter. I am amazed at the magic that something I am growing out of mere flour and water transforms into a bubbly mass with the capacity to prompt a dough, and then a bread, to rise. My sourdough starter is creating breads with as much rise as the commercial yeast; I hardly resort to "regular" yeast anymore and the yeast jar currently resides in the bottom of the freezer - out of the way and mostly unnecessary.

Yes, there is a scientific explanation. Yes, this task has been performed for thousands of years, and by illiterate people. Still, the combination of simple ingredients, adding only air and time, to mix with flour, water, and salt - to amount to this sweet smelling, delicious concoction that is a bread. Well, it is easy to understand why ancient people created gods to which they attributed the force that natural yeast produces. 

A pretty decent and everyday sort of miracle. 

No lack of starter advice
No two people will give the same advice about how to create a starter. My advice, for what it's worth, is: Start two starters. If both thrive, wonderful, but probably one will. I would go with (1) a rye flour and (2) a white all-purpose flour. Some people use spelt starters. There is general starter advice from the Sourdough Companion forum. Many books and websites have sourdough starter suggestions. I especially like this all-about-starters post from the now-defunct Tartine Bread Experiment. Here is my advice. [Admire the lovely bubbles of fermentation in the photograph. Oohs and ahhs are appropriate.]


How to start a starter
Use a clean glass jar. 

Use spring water - not tap water. Whatever chlorine or other additives are in tap water do not make for happy starters, particularly new ones. Go somewhere else for a scientific explanation, but that advice is universal.

Combining the flour and water: Add equal weights, but amounting to a quarter cup or more each of the flour and water. It does not matter whether you add a cup or half a cup of water. If you do not have a scale, then add a third of a cup of flour for every quarter cup of water. Mix well. 
 
Cover the flour and water mix loosely with one of the following: a top of a jar, a paper towel or a loose piece of plastic wrap. The starter will need some air to get going and stay healthy. Keep the jar unrefirgerated and, preferably, in a warm kitchen. Don't sweat this; I started mine in a cool kitchen in the winter and it thrived.

Mix well a few times a day. Watch for bubbles. They might take a few hours or a couple of days to appear. When bubbles appear, throw away about half of the mix and feed the starter with about equal weights of whatever flour you are using and water. At this point, the objective is to get the starter going and not to produce a huge amount. Feed twice a day after bubbles appear.

Mental health warning
Do not be alarmed - you will be obsessed about this and constantly checking to examine bubble activity.

Consistency
Consistency is critical. A starter should be more of a muffin batter consistency than a pancake batter. A wet mass, but not runny. It should not pour easily. Think thick and viscous. I typically add about double the weight of flour to water. Many people go for a 1:1 ratio. There is no wrong answer; whatever works is fine.

After about a week, if there is a bubbly, happy mass, congratulations! The first time or two using the starter, feel free to mix in a tiny amount (a quarter to a half of a teaspoon) of commercial yeast. Once the starter is healthy for a couple of weeks, it can go it alone to produce some fine breads. [Photograph of my pretty starter right before use and feeding. Notice the bubbles and the small amount.]

Sustaining a starter
Let go. Forget amounts. Forget fractions, as in use or throw away half of the starter before feeding it. Forget everything but the look and smell of a good starter. Add to the starter, use some, and/or cast away some. 

Determine whether you are maintaining the starter amount or growing it. That will determine whether to keep or get rid of some when feeding it.

Adjusting with different flours
For making breads with different types of flours - whether spelt, whole wheat, rye or whatever - one can feed the starter with a different type of flour once or twice in preparation for making a bread with a particular type of flour. Or, switch the flour type occasionally just to play or inject a little different taste in one of your usual breads.

Feeding schedule
In the refrigerator - feed twice a week. Many experts recommend once a week, and that can be done, but mine looks weary by then, greyish water on top. Twice a week and it will never appear sick.

Out on the kitchen counter - feed twice a day. Once a day will sometimes do; sometimes that's a bit of a stretch. Twice a day guarantees consistent health of the starter - especially in the summer.

Change the jar about once a month. No one wants to see dirt or unwelcome mold. Sorry to mention that.

Baking preparation
Some say starters are ready to use right out of the fridge; others say they need to be tended for up to three days. I take the middle ground. I usually take out the starter 24 hours, but sometimes 12 hours, before using it. I like to feed it twice, ideally, before putting it to work. On the counter, with some warmth, the sourdough culture thrives, becomes happy (as we all do with some warm air) and it is ready for action.

How much starter to use? Recipe instructions are not mandatory. More starter = less time needed for bulk fermentation of dough. Higher temperature in the kitchen has the same effect. Futzing with starter amount and room temperature can speed up or slow down the process. Personally, I like a nice long fermentation period so that those good bacteria can grow and produce a nice tangy taste in the bread.

Adjusting yeast or starter amounts
Many recipes call for commercial yeast. First, the amount given is typically geared toward quick rising - the more yeast, the quicker the rise. Generally, such recipes will include a tablespoon (or equivalent) per loaf of bread. Even without starters, one can improve the bread by using much less yeast - even as little as 1/4 teaspoon - while adding a great deal of time - generally going from a two-hour first rise to an overnight or longer first rise. I like the additional time because it enables overnight and all-day (go to the office) rises.

The rule is the same for starters: The more starter, the quicker the rise. Many recipes that include starters also call for dough made in stages with a preferment of biga, sponge, levain, poolish, or whatever variation. Again, I am learning to put in less starter for a longer time to rise, whether or not that includes a preferment or just an all-the-ingredients-together first rise. 

Another variable in the starter or yeast equation is the temperature of the room in which the dough is rising. Rising times vary considerably from a 55-degree kitchen on a winter night and a mid-day summer kitchen of 90 degrees (for people like me who hardly turn on the air conditioning). In summer, I am learning to use a quarter of the yeast or starter I would add in the winter so that I can keep the rising time the same throughout the year.

Substituting starter for yeast
A common question is how to substitute starter for commercial yeast. Some use a rough general rule of a quarter to half cup of starter. That's me. Some meticulously account for the amount of flour and water in the starter as substitutes for amounts in the recipe, also adjusting for a preliminary build/preferment stage. I've done this as well. I really cannot say that the more mathematically-correct method works better. The loosey-goosey method ends up just as well.

There is good information on some freshloafonline forum discussions. I'm sure there are more and the forum is searchable. Here are some freshloaf discussions with a variety of suggestions:
Amounts of starter to use
Substituting starter for yeast

Going away on vacation? No need for a kennel
Leaving for more than a long weekend and there's no friend able, willing and knowledgable to feed the starter? No need to worry. Put the starter jar in a plastic bag and place it in the freezer. Defrost when you return and keep it out on the counter for a few days, if not a week, feeding it twice a day. The starter will take up to a week to forgive you, but it will revive, just not automatically or instantly. After tender love and care for those days, the starter will be ready for baking and to be put again in the fridge.

Trouble with a starter?
I found this all-about-starters post from the now-defunct Tartine Bread Experiment to be the most detailed and helpful information about troubleshooting starter issues and, indeed, about beginning one's own starter. Basically, in my opinion one should feed frequently enough, keep things clean, use filtered water, and stick to a starter consistency (whether like pancake batter, cookies or runny) that works for you.


Tuesday, July 9, 2013

Bread - Number 28: Summer Heat Calls for Timing and Other Adjustments

Bread - Number 28: Knowing when to stop

Knowing when to stop is critical, not only for lawyers doing cross examination, but in life and bread making. I am not good at this. I continue on long past when the work is complete - with giving my daughters some message, with my crappy art work, and with cooking vegetables. Dough has no flexibility for overdoing. With dough, there is a moment of no return; but no light flashes on to announce when that moment has arrived. So it's guesswork - sometimes educated, sometimes not. Forgiveness for oneself must be learned, fermented, as it were, because for the casual amateur baker, mistakes will happen, attempts at something or other will not turn out well, and one has to be willing to be patient with one's imperfections.


I have to learn to adjust my recipes for an 80-to-90 degree kitchen. The sponges and dough seem to rise literally twice as fast as in a winter or spring kitchen and I should be employing only half as much starter. This, of course, has yet to happen. Instead, the alarm of a sense in the middle of the night that a sponge or dough has risen sufficiently - and is on the verge of an over rise - wakes me up, sending me to the kitchen.

Later ...
As it turned out, one white bread is merely one bread and does not begin to pierce the surface of possibilities. This particular white bread, speckled with bran flakes, is adjusted from Laura Chattman's book, Breadmaking: Crafting the Perfect Loaf from Crust to Crumb. I have yet to finish the book, but I will say that Chattman gives simple, comprehensible explanations and goes into depth on types of preferments, starters, and breads. She starts with basic, commercial yeast, mix-the-dough recipes and proceeds pretty far down the road. The book, however, goes far afield with flat breads and breads from several countries. I am not a big fan of the "everything bread in one book approach," but I like her accessible attitude.

This bread was made in between two crumb cakes, which my family calls my signature recipe. (They are brutally honest and do not request my pies.) So, with the distraction of the Fourth of July, family in town, and other baking, I made this bread twice. The first time, the bottom came out burned - due to an error in oven temperature - but with a good taste.

Please note that my recipe is two thirds of the original, which is almost a giant bread (or, in fancy terms, a miche.)

Instructions 

Sponge
1.5 oz. starter
1.6 oz. water
2.4 oz. bread flour
.2 oz. rye flour

Hot kitchen: Disaster averted via refeed of sponge
This sponge is supposed to take from eight to 12 hours to fully rise. In a very warm kitchen, the timing was five and a half hours. I should have added half of the starter and I might do this on a third try. To avert disaster on the first attempt at this bread, after allowing the sponge to sit overnight for eight hours, I just added a small - proportioned - feeding, with time for the new sponge to rise. Remembering that a sponge is merely a fed starter, I took the "feeding" amount out of the later dough ingredients. This worked perfectly. [Photo of autolyse before mixing in sponge and dough ingredients.]

Dough
9 oz. water
15.6 oz. bread flour
.7 oz. wheat bran
1 tsp. salt

Autolyse and kneading
Confession that I forgot this step the first time around. The second time, I followed the recipe for a 20-minute autolyse phase, which means mixing the dough ingredients of water and flour together and leaving it alone - sans starter and before adding salt. I don't think it matters whether the wheat bran goes into the autolyse or whether it is added right after. The claim of autolyse adherents is that gluten strands are formed and less kneading is required. My sense of a good knead and what a dough's texture should be is not sufficiently developed for me to trust my thoughts on this.


After 20 minutes, mix together the autolyse and the sponge. Add salt and mix together well. Though the instructions called for 15 minutes of hand kneading and 12, if I recall, if using a machine, I kneaded for 20 minutes. I have small hands and they are not strong. [Photo of sponge on left and autolyse on right.]


Rising on and on
This bread recipe calls for four to five hours of rising, with human intervention every hour or so. I have yet to get this part right. For me, this requires diligent use of a kitchen timer and being in said kitchen.
  • 1 hour rise in kitchen bowl sprayed with baking or other non-stick spray (for the second try, I used a well-floured bowl and a good spatula). Cover with plastic.
  • Turn the dough by picking it up and plopping it down on one of its sides.
  • 1 to 1 1/2 hours rise again in same bowl.
  • Shape and let rise in a basket or bowl for two to three hours. Cover the dough with a kitchen towel or plastic. This is where I screwed up the second time and mine slightly overrose. I shaped it again, per Chattman's advice on this topic, and it rose pretty well. (This is part of the reason I refuse to draw conclusions yet about autolyse and kneading. Mine is far from a controlled experiment.)

Baking
Preheat oven to 500 degrees and reduce to 475 when placing dough in the oven - on a baking peel.  I used parchment paper. For this size bread, I recommend about 42 minutes. Mine could have used a few more than the 39 minutes I tried.

The bread crackled nicely both times when it was taken out of the oven. The taste is good, though very white, which in our house is a weird experience. The bread is pretty. Did not get a huge oven spring, though I was impressed both times. Might make something like this in a no-knead version to compare.

[Note: If I make this bread a third time, this post will be significantly edited to reflect that.]


Saturday, May 25, 2013

Bread - Number 24: Indestructible and One-Third Whole Wheat

Bread - Number 24: You cannot ruin this mostly white bread

This one-third whole wheat bread dough could probably be dropped on the floor and stomped on and would still turn out decently. I love that, but wish this were so with more whole grain doughs. This bread is based on Bread #5, Part 2, but with starter and with previous volume-based measurements adjusted for weight measurements.The great news is that the starter works just as well as the commercial yeast. It is possible to use a small amount and a long rising time for wonderful results. I prefer long rising times for taste and for the convenience of being able to go out to work all day. 

I baked this bread twice because the first time it ended up a bit pasty, as if wet. I needed to trust my instincts and use my own weight-adjusted measurements instead of those on even trustworthy websites. Just because someone else says that one cup of bread flour is the equivalent of 128 grams of bread flour does not mean that your cup of bread flour, or anything else that you have been using to make delicious breads, is that same 128 grams. It might be 139 grams or 160 grams. 

The second time, I measured a cup of the whole wheat flour and then a cup of the bread flour and transcribed my measurements for each. The dough, magically, was more like cake batter and less pancake-like. The results were much improved, with just the smallest bit of wetness still left in the dough. There was a beautiful crumb and a lovely crust. This good, even lacking the good-luck cross/star slashed into the top of the dough before it went into the oven.

There's a movement? And has it already passed me by?
When making this sourdough starter and the dough, I kept hearing Michael Pollan on the radio, seeing references to him on twitter, and clicking links to watch his television news appearances. His presence gives gravitas to a movement of which I was unaware until recently. Slow food is quickly going mainstream. Now, people beyond Brooklyn and Portland are fermentation experts. Before I started this 108 breads project, I did not know about starters, the supposed health benefits of fermentation, or the existence of locally-milled flours. Actually, I had no idea of the universe of flours, books, and products in which one could become immersed, if not obsessed.

I had never seen a sauerkraut recipe or passionate descriptions of any. The idea of homemade sauerkraut would have caused my eyes to roll. Now I am the crazy person considering burying the jar of fermenting sauerkraut in the backyard per a friend's/another crazy person's recipe. But then he is the one who loaned his copy of 52 Loaves to me and started this whole obsession in the first place.

As usual, I am slow, and quite late to slow food. As it happens, however, I gave up most sugars and white flours years ago. Hardly ever let my children near an antibiotic and I consider a Diet Coke something for a special occasion. (Though every few years there are months of a daily diet soda.) Slow food was something I started before I was aware I was doing anything. Oh, and this week I give up all cakes, cookies and pastries for at least one year. I would rather have a nice slice of bread.

Ingredients
143 g. whole wheat flour (one cup)
332 g. bread flour (two cups)
1 1/2 cups water
11 g. starter
1/2 tbsp salt

Instructions
Very simple. No sponge, levain builds, poolishes, bigas or other preliminary dough stages. Just a good bread that is pretty much indestructible. Mix all ingredients. Let stand for 12 hours in a bowl that is loosely covered in plastic. Place dough in fridge for up to a couple of days or move on to preparation for baking. I kept my dough in the fridge for six hours, but I have left it in for more than a day.


Forgot to keep notes, so probably did usual shaping and left out for an hour to an hour and a half. I preheated the oven to 500 degrees with la cloche top and baking stone inside. Also, I did not write down how long I left it in the oven, so probably 40 to 45 minutes. A bit distracted with the new internal thermometer, which is mostly good. One should be careful to insert the thermometer into the center of the bread and not all the way almost to the bottom.

The taste was fantastic. An easy bread and a cheap thrill of feeling like a skilled baker. And the bread looks beautiful. Okay, the photograph of the bread cut open reveals its fault.

Just to have something to shoot for, the dough needed to rise some more.


Sunday, December 30, 2012

Bread - Number Nine

Bread - Number Nine: Climbing out of the single digits with total whole grain
100 percent whole wheat

Dedicated to the permeating, homey, wafting aroma of baking bread. Should have had an open house today it smelled so good.

Experimented with 100 percent whole grain and with longer rising and baking times. That is the luxury of a stay-at-home vacation. May never travel anywhere again, so nice it is to let the dough rise for as long as it needs, to have a leisurely breakfast after mixing dough, to read the newspaper when waiting for whatever is the next step, and to spend hours painting that table that has been patiently waiting, though eyeing me with the indictment of its unpainted presence. 

Missed Brad's Sunday visit and bread tasting as he is off on exciting international vacation, but did heed his advice to take photographs and bask in the glow of rising dough and crunchy crusts.

Not accepting as a sign from Jesus the fact that my bread slash designs are uniformly resulting in crosses at the top of the breads. But a liberal, socially conscious rabbi/carpenter would approve of bread making, perhaps telling me to add some volunteer work to my days. 

[Close up of Bread Number Nine and its cross on the top.]

Ingredients
3 cups white whole wheat flour
1 1/2 tsp salt
1/4 tsp yeast
1 1/2 cups lukewarm, purified water
Optional: small ball - maybe 1 inch diameter - previous batch of dough (Actually used the dough from this bread for my next dough, which was a mostly white flour mix with one third whole wheat.)

Instructions
1. If using the small ball of previous batch of dough, take the previous batch's bowl, with small ball of previous dough, and add lukewarm water. Mix in whatever old dough is on the sides and chop up small ball of dough. Do not mix. Let sit for five minutes. 

Using a bit of the previous batch of dough makes for a lazy sourdough and gives the bread a little more depth of taste. Convenient and less washing up when making a new batch when just starting to prepare the previous batch for rising and baking.

2. Mix dry ingredients. Add water.

3. If using the small amount of previous batch of dough, now take out immersion blender and mix well the water/old dough mix.

4. Dump dry ingredients into bowl of wet ingredients. Mix well. Mix and mix. Though there is plenty of water, it quickly absorbs the flour mix. Keep going and get wet hands in there if necessary to mix all of the flour mix into the liquid for a cohesive dough.

5. Cover bowl loosely with plastic. Better if set in a warm place. That is not always possible; do not fret. Good bread will result either way.

6. Let the bowl sit out for 12 to 18 hours. Let mine sit for 18 because the kitchen was quite cool, there was no place to rush off too, and it is good to experiment. Heated kitchen for the final two hours of rise. Not sure if that made any difference.

7. When dough is risen (just rely on experience or guess), either prepare it for baking or place in refrigerator - with plastic still loosely covering the bowl. Only differences are  that unrefrigerated dough will be stickier to work with and will only need about a half hour to forty minute second rise.

8. Take out bowl from fridge and remove plastic. Lightly flour the top. 

[Dough from another bread - mix of bread flour and white whole wheat - risen about three hours.]

9. Lightly flour a board and flatten the dough, stretching a bit. Fold in thirds, like an envelope, then fold in half. If, like me, you do not find the shape pleasing, or it is weird in some way, just work a bit more. Do not knead.

10. Leave dough on board and loosely cover with plastic for 15 minutes.

11. Take out a clean bowl, flour the bottom and lower part of sides. Put dough in bowl for final rise of 90 minutes (less if using unrefrigerated dough). It is suggested to put the bottom right side up, but this is not crucial and can be remedied later. Lightly sprinkle top with flour. Cover bowl with a kitchen towel or loosely cover with plastic.

12. Place top of la cloche in oven on baking stone. Preheat oven at least 45 minutes ahead of baking to 500 degrees.

[Same dough as previous photograph, this time after rising for five hours.]

13. Now for the part that makes one feel like an expert. Take dough and either do a final shaping (not suggested, but mine turn out fine) or dump onto well-floured baking peel. Do decisive, one-stroke slash about 1/4 inch into dough. Do a second or third time, depending on what design is preferred.

14. Open oven, remove top of la cloche, and slide dough onto baking stone. Cover dough quickly with top of la cloche. Close oven. Leave for 30 minutes approximately. Left mine for 32 as my breads have seemed to need more time.

15. After 30 minutes or so, reduce oven heat to 450 degrees and remove top of la cloche.

16. Leave bread in for 15 to 20 minutes uncovered, then remove. Checked mine at two-minute intervals after 13 minutes and it needed 19. Wanted to err on the side or more time because have had the sneaking suspicion that some of my breads were a touch underdone. Place bread on top of stove or on a rack to cool for two hours.

17. Tell person watching television to turn off, pause or mute whatever is being watched so that beautiful bread's quiet crackling can be heard and appreciated.

And, two hours later, taste. Nice crunchy crust, brown, slightly burnt right at the top. Light, yummy, interior, with not as many airholes - crumb - as a bread with white flour. Delicious and good to know that a 100 percent whole wheat, albeit a so-called white whole wheat, can turn out sufficiently well to automatically be a wonderful everyday bread.

[One last look before eating.]

Tuesday, November 6, 2012

Bread - Negative One


Bread – Negative One
And a Memorial to My Friend Rebecca

Ingredients
1 cup water, maybe a tiny bit more
¼ cup oil (I use olive or canola)
1 tsp salt
¼ cup honey or sugar (if honey, add with liquids)
3 ½ cups whole wheat or white whole wheat flour (I use King Arthurs)
1 tbspn yeast (make a little well in the flour for the yeast; make two if adding sugar instead of honey)

Instructions
In a bread machine, the dough will take two hours to be ready, so you can be lazy and avoid kneading and rising; or, like me, bread making seems too intimidating and you have no idea what yeast bubbles or proofed dough or dough consistency should all look like. When the bread machine has been mixing for five minutes, open the top to check the dough. Sometimes I put in the wrong amount of liquid or flour and the mistake can be corrected without any consequences at that point. But the flour varies with each batch and with the seasons. Sometimes the 3 ½ cups requires a little more water, maybe a tablespoon or two, or sometimes it has a slightly wet appearance, or worse, sticks to the sides. Then the dough needs some more flour, a heaping tablespoon or two, or very rarely a quarter cup.

Preheat the oven to 325 at an hour out so the oven is nice and hot. Use a baking stone or a cookie sheet with parchment paper. When the dough is ready, take it out, adding some flour or putting flour on a wood cutting board if it is sticky (not a technical term, but has a tangible meaning). Good to fold the ends under for a nice boule, or to cut slits in the top, though unnecessary. Fine if the bread is oblong as shape is an aesthetic preference.

Total baking time is 40 minutes. Do that the first time at one temperature and see what your oven tells you in terms of more or less time, and what you want your crust to look like. I bake for 32 minutes, then turn around the bread and up the temperature to 400 for eight minutes. The oven will only be up that high for a couple of minutes, but the crust looks better.

Starting lower than zero
That’s the recipe I’ve been making for seven years. I stayed happy with my one recipe. I’m not ambitious. I have one good cake, some good cookies; don’t care if there’s more. I made 800 cookies for an event, including some funny black and whites that were tasty, but did not look like the neat half and half design one sees in bakeries.

Start of a bread 
Then my friend Rebecca was sick and her rounds of early testing required a no-iodine diet – for weeks, which not only meant certain foods were allowed and certain ones were prohibited, but that certain ingredients, salt in particular, required special attention. You can’t go out to eat when you have to ask what type of salt is being put into foods and Rebecca loved to eat and to eat out. So I made her a whole wheat bread she could eat.
  
The bread was good and started to make it for my kids, who ate it and gave up the disgusting potato bread we’d been making sandwiches with. I’ve been making it once or twice a week ever since, well once now that the last daughter is away at college now. Lately, reading about what bread should be like and what ingredients it should only have, and wondering if I am up to the task, and curious to expand (can I even call it) my repertoire, I want to embark on 108 breads. Not sure I will get there and knowing this will take – indeed designing this journey to take – more than a year, probably two and maybe four, if I don’t quit.

And I dedicate this to the memory of Rebecca, who passed away a few months ago, after she could not eat or drink and lived through years of drugs and testing. She got me on my way to make a good bread. I hope, Rebecca, that wherever you are, you are enjoying fun, delicious meals and choosing wine for the table, with good conversation and lots of laughter. 

Finally doing this! 
Oh, and I forgot to say that I’m going to blog it, and maybe tweet, and that I haven’t started any of that yet either, and that’s why this is bread negative one. Climbing up to zero.

Editor's Note: Posting the first few breads in rapid succession because actually wrote this weeks ago.