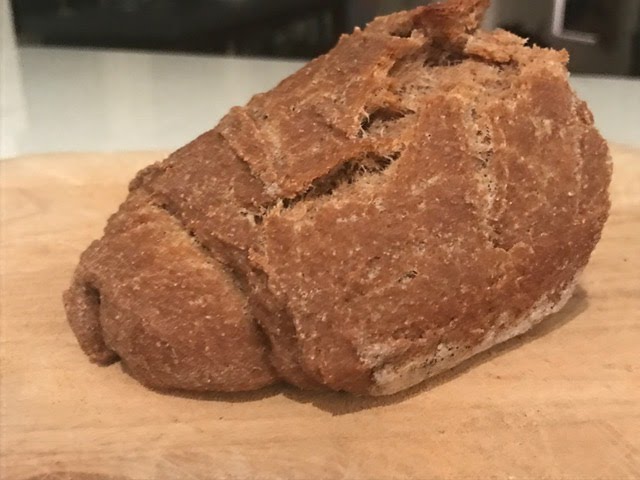
It is true that I am unable to follow anyone else's recipe except for my sister's challah recipe. Bread #95 bread is roughly the Reinhart recipe of a 100 percent whole wheat sandwich bread, but with the significant differences of using sourdough starter and changing the timing due to real-life needs to leave the house and to sleep occasionally. I've now made it twice and it had lovely oven spring each time. The first try was immediately frozen for offspring to eat healthy-bread-from-Mom.
I managed to make multiple breads for the offspring before they left the nest following their winter vacations. I have also discovered another local bread soulmate, who has furnished me with some challah recipes, one sourdough, and what looks like a nice rye.
Not a quick bread
This bread is at least a two-day affair because it involves a soaker, a biga, and running out to the store for yogurt when you find that you ran out. A biga is basically a dough-like pre-dough, more solid than a sponge, and a soaker allows flour to sit in a moistened state, with some salt, anywhere from overnight to a few days. This is similar to an autolyse, except for the much longer duration and the salt. I used a full-fat yogurt with part of the layer of cream that sits on top. It's also grass-fed and I am sure the happy cows were well brought up and were educated at highly-esteemed cow/cattle institutions of higher bovine learning. (You need to watch the early Portlandia episode to get that joke completely.)
Ingredients and instructions
Soaker
226g whole wheat flour
5g salt
198g yogurt (mine was not watery)
Mix well and do not add water, milk, or more yogurt until finished mixing. This pre-dough will appear dry, but do not worry, the liquid is most likely sufficient. Cover bowl after mixing and leave on counter. I left mine out for almost nine hours, but you have up to 24 according to Reinhart's recipe.
Biga
229g whole wheat flour
100g starter (mine is part whole wheat at this point)
160g water
Mix and cover. The instructions call for a prolonged refrigeration, but I wanted it to proceed that evening, so I only put it in the fridge for about five hours and then left it on the counter in a warm kitchen for another two.
Dough
Soaker
Biga
14g coconut oil - melted (Trust me, I did not melt it the first time and the second try went much better.)
10g honey
6g salt
I mixed and then let the dough sit for five minutes, at which point I kneaded for two minutes and did a stretch and fold. I have little patience for kneading. Perhaps I have to listen to better music or have something to watch on TV. I did three more stretch and folds at half hour intervals. Then, the hour being late, I covered the dough and put it in the fridge for 23 hours.
Baking preparation
FYI: This bread gets baked at a rather low temperature and takes relatively long to bake. Preheat the oven to only 425 degrees. I preheated with the oblong la cloche inside so that I could get a longer, thinner shape, though not nearly a baguette.
I also have been trying putting rice flour inside BEFORE preheating. This accomplishes two things, but heed the warning that follows.
1. Less heat loss when putting in dough.
2. Less time standing in front of hot oven.
BUT - here is the warning:
When opening the la cloche, stand back because the slightly baked or burnt rice flour can sometimes be smoky and cause your eyes to tear. This did not happen with the oven on this relatively low temperature, but I have experienced that when the oven is hotter.
Sprinkle the counter with rice flour. Right before baking, take the dough out of the fridge and shape into an oblong loaf on top of the rice flour counter area. This is very easy with a cold dough, plus the rice flour gives more anti-sticking protection for your dough. If you have ever been unable to get a dough out of a la cloche, a Dutch oven, or other contraption, you know what a desperate situation it is to look at a beautifully risen loaf and be afraid it will be ruined because it is stuck to whatever you baked it in.
Sprinkle the top of the dough with water. I did not use seeds on top, but go ahead, it would be great. Do a few slashes, maybe four or five, and then put that baby inside the la cloche or whatever and bake.
Baking and voila
After putting dough in, reduce oven temperature immediately to 350 degrees. Bake for 25 minutes and turn around la cloche. Do NOT open it. Let that hot air and steam stay inside. Total baking time 50 minutes. Perfect. I love it when I guess the timing exactly right. So proud.
Beautiful oven spring! Taste: Mixed voting here. I really like this one; it's a good basic bread either for sandwiches (because the yogurt softens the dough and makes the bread easy to cut) or for just some bread and butter. Perfectly lovely addition to the bread repertoire. However, a spoiled family member, whose tastes run to a strong preference for rye breads and now breads with rosemary (with a decided dislike for spelt), found this bread eh, as in average, okay, but definitely edible as he has managed to voluntarily eat it a number of times and without complaint.
Update below!
So important: No tragedy resulted from a violation of my personal no-bread-making-activity-before-5-a.m. rule.
Flaxseed, whole wheat and arrowroot with sponge, soaker and long preferment - sounds much more difficult than it is. Basically, there's 20 minutes of weighing and mixing one day and either the next day or that evening another 10 to 15 minutes; then maybe a total of another minute prior to baking. This might be a bit of an exaggeration. Still ... Easy, but impressive, delicious and beautiful. [Photos are of my hometown of Brooklyn, NY and bread #66.]
I mixed up the soaker and the sponge for an overnight rest. The next day, mix the two, add a few more ingredients, do some stretching and folding, and put in the fridge if you have an actual life to attend to. When you decide to bake, once the oven is preheated and the dough is shaped, you are done. A dough that leaves plenty of time to go out to the diner with the spouse, and even say yes when he presses to go shopping for those kitchen cabinets you said you would find, because the whole kitchen project seems to have embedded different time lines and senses of priority in our brains.
 I made this bread twice as my digital scale is acting peevish, making me wonder if it is either having hiccups or preparing itself for permanent retirement.
Everything in grams
I made this bread twice as my digital scale is acting peevish, making me wonder if it is either having hiccups or preparing itself for permanent retirement.
Everything in grams
| INGREDIENTS |
SPONGE |
SOAKER |
DOUGH |
TOTALS |
| Water |
100 |
224 |
48 |
372 |
|
|
|
|
|
| Starter |
100 |
|
|
100 |
|
|
|
|
|
| Bread
flour |
100 |
|
80 |
180 |
|
|
|
|
|
| Whole
Wheat flour |
|
174 |
|
174 |
|
|
|
|
|
| Flaxseed
meal |
|
47 |
|
47 |
|
|
|
|
|
| Salt |
|
5 |
5 |
10 |
|
|
|
|
|
| Arrowroot
flour |
|
|
69 |
69 |
Is that not a gorgeous table? So neat, so clear about which ingredient was added and when. Such a visual representation. How sad, it was not saved with its cheery orange lines. That's what made it gorgeous. In case the table is not one's preferred format, the ingredients are listed at the end of this post.
Actual information
Okay, that's an 80 percent hydration dough. The table does not include the unweighed sprinkling of sesame seeds on top just before baking. I should also say that I used the same Danish whisk, uncleaned in between sponge and soaker, so that the soaker would get a wee head start on fermentation, which it did. Not much as there was salt in the soaker.
 Always remember to cover the bowl. I used shower caps to cover the bowls of soaker, sponge and the dough. The shower caps can be cleaned and are reusable.
4 a.m. and no mishaps
The soaker and sponge were made at 4 a.m. I put the heat up in the kitchen early so that they would be ready to be mixed into a dough about mid-day. Yes, I could have mixed up the soaker and sponge the night before, but I got lazy in the evening and we had a nice gathering until late with the spouse's colleagues from the office.
Always remember to cover the bowl. I used shower caps to cover the bowls of soaker, sponge and the dough. The shower caps can be cleaned and are reusable.
4 a.m. and no mishaps
The soaker and sponge were made at 4 a.m. I put the heat up in the kitchen early so that they would be ready to be mixed into a dough about mid-day. Yes, I could have mixed up the soaker and sponge the night before, but I got lazy in the evening and we had a nice gathering until late with the spouse's colleagues from the office.
The only difference between the first and second tries of this bread was in the amount of starter, which I accounted for in adjusting slightly the bread flour and water amounts. The activity of the dough and the eventual bread all turned out the same.
Resting, mixing, and so on
9.75 hours for the soaker and sponge to rest. Mixed up the dough and did three stretch and folds, plus a couple of minutes of kneading, every 15 minutes. Let rest for thereafter for 3.5 hours. I admit I started out with only 40 grams of bread flour to add to the final dough, but added more right away, then 20 grams with each stretch and fold, because the dough was so sticky. About what I did the first time before the digital scale had a tantrum and would not permit further weighing. Fortunately, it came back to life with the next bread.
At the end of 3.5 hours, my brain turned off due to the 4 a.m. wake up. I could not decide what to do with the sticky dough that had risen nicely. Shape and put on a floured towel in a bowl? Put in an oiled bowl? A loaf pan? I procrastinated. Just shoved the dough bowl, with its shower cap cover, into the fridge.
I only left the dough in the refrigerator for a couple of hours. My husband asked if we were going to have fresh bread for Monday morning and I suddenly remembered - OMG, time to get ready to bake before the brain shuts off for the evening. A 4 a.m. wake up does not bode well for nighttime thinking.[Photo of the door to
Mile End Deli. Great chopped liver and I'm a vegetarian. Still, could
not resist when it was made with schmatlz.]
Baking
Preheat oven for one hour at 470 degrees with dutch oven inside.
 I removed the dough bowl from the fridge and lightly, perhaps not so lightly, sprinkled flour on top and underneath all around the dough, to prevent utter stickiness. I shaped the dough quickly, sprinkled on sesame seeds and did three slashes on top. I put my floured hands underneath the dough and pretty much dropped it into the dutch oven. I remembered to put back on the oven mitts before placing the lid on the dutch oven for baking.
Try not to be nervous, but rather achieve a sense of calm, when removing the top of the dutch oven prior to placing the dough inside, and then when plopping the dough in the dutch oven. I use oven mitts and a kitchen towel. Super hot.
Total baking time of 45 minutes; I removed the top of the dutch oven at 30 minutes. Kudos to my thermometer
for telling me when the bread was actually fully baked as it looked
lovely way too early to be taken out of the oven. Beautiful brown bread and so, so good. This is why I learned to make bread. Yum-mmmmm-y.
I removed the dough bowl from the fridge and lightly, perhaps not so lightly, sprinkled flour on top and underneath all around the dough, to prevent utter stickiness. I shaped the dough quickly, sprinkled on sesame seeds and did three slashes on top. I put my floured hands underneath the dough and pretty much dropped it into the dutch oven. I remembered to put back on the oven mitts before placing the lid on the dutch oven for baking.
Try not to be nervous, but rather achieve a sense of calm, when removing the top of the dutch oven prior to placing the dough inside, and then when plopping the dough in the dutch oven. I use oven mitts and a kitchen towel. Super hot.
Total baking time of 45 minutes; I removed the top of the dutch oven at 30 minutes. Kudos to my thermometer
for telling me when the bread was actually fully baked as it looked
lovely way too early to be taken out of the oven. Beautiful brown bread and so, so good. This is why I learned to make bread. Yum-mmmmm-y.
 Here's the promised list of ingredients
Totals for all ingredients
Water - 372g
Bread flour - 180g
Starter - 100g (82g on the first try, with adjustments elsewhere)
Whole wheat flour - 174g
Flaxseed Meal - 47g
Arrowroot flour - 69g
Salt - 10g
Ingredients listed in order of appearance for each phase.
Sponge
100g starter
100g water
100g bread flour
Soaker
174g whole wheat flour
47g flaxseed meal
224g water
5g salt (Don't sweat this. The last time I mistakenly added 6g and then only 4g to the final dough. That goes for almost any ingredient and life in general.)
Dough
Soaker
Sponge
69g arrowroot flour
 80g bread flour (Added 40g initially, and 20g each at points thereafter in an effort to reduce stickiness - or, for those accustomed to more technical terms, hydration.)
5g salt
80g bread flour (Added 40g initially, and 20g each at points thereafter in an effort to reduce stickiness - or, for those accustomed to more technical terms, hydration.)
5g salt
Update - Made this one again, a little differently
I took out the arrowroot flour, substituted cornmeal and increased the whole wheat flour share just a bit. Also added sesame seeds on top. At 475 degrees, the bread took 40 minutes to bake in the dutch oven. Totally great.