Showing posts with label Whole wheat. Show all posts

Sunday, May 17, 2020

Bread Number 100: Adapted River Cottage Sourdough

Self-awareness is a good quality and never more so than when realizing that a professional male baker's hands doing 10 minutes of kneading is not the equivalent of 10 minutes of kneading by a woman who needs a device or a strong man to open every jar. I have various tricks when it comes to opening jars, but my hands are never enough.

My failure to either almost never adequately knead or to have the patience to adequately knead is why I love stretch and folds, which offer great results without the time, effort, and anxiety of kneading.

Significant Adaptations


The first time I made the River Cottage Bread Handbook Sourdough Bread, I kneaded and the resulting bread prompted my husband to say that it was the worst bread in a long time; damning statement that it was decidedly mediocre. [Read bread book reviews. The River Cottage Bread Book is listed under Advanced to Way Beyond Me.] On the second try, I did stretch and folds; the bread was much better than the first, but still way far off from the favorites.

When I switched to stretch and folds instead of kneading, I also decided to get rid of the guidance to do a once-an-hour degas to the dough.

Pretty Straightforward Ingredients and Instructions 


Sponge

120g starter
272g water
250g bread flour

Mix, cover, and let sit overnight and beyond for 14 hours in a cool, but not cold, kitchen.

Dough

300g turkey red whole wheat flour, which is almost white
12g salt

Mix and cover.

Four stretch and folds, each 15 minutes apart. Could easily do stretch and folds up to 30 minutes apart.

Let rise for five and two-thirds hours.

Prep and Baking


Preheat oven to 500 degrees.

I shaped the dough into an oblong shape. Cover for one hour while the oven heats. I also preheated the top of an obling la cloche on a baking stone, but one can easily use loaf pans instead for similar results with a slightly different shape.

Baking

  • 10 minutes at 500 degrees.
  • Instructions say to decrease according to color of the dough at 10 minutes. Mine was still pale, so I only decreased the oven temperature to 400 degrees. I baked for another 26 minutes and it could have been a couple less.


And ...


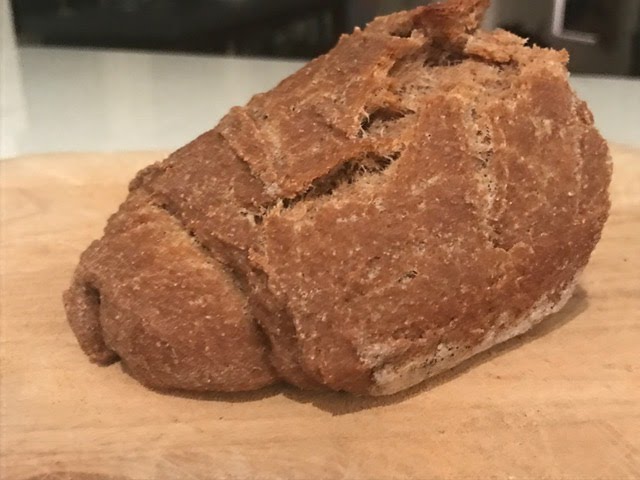
Good bread with a nice oven spring. Nice taste, but nothing amazing. Can do an easier recipe with results that are as good or better.

The bread appears white even though I used about 50 percent whole wheat, probably because the fine turkey red flour is incredibly whitish despite being whole grain.

Bread Number 99: Grumpiness Lends Itself to Honesty

Maybe I am asking too much, but to me a recipe should have actual amounts. Without amounts or ranges - with advice about how to select within the range - how am I supposed to know if I am on the correct route or not? Advice like "adding additional flour or water as necessary to make dough" tells me nothing. And rough drawings are fine as artwork, but they fail as directions.

I'll just be frank; bread recipes as a rule should not assume that we all live in centrally heated or air-conditioned homes or have professional kitchens and equipment. There should be instructions that, like dough, vary with the temperature, and accomodate the spectrum of the seasons. Many recipes offer instructions for both hand mixing and kneading and electric mixers, so why not also account for the relative warmth or coldness of one's kitchen?

I Am Lazy, So Cater to ME 


Desem Bread, basically a sourdough, from Laurel's Kitchen Bread Book is not a recipe for me. I'm getting impatient with volume measures; I much prefer weight. I also don't prefer, since I am in an all-out grouchy mood, instructions that require that I go back to some unspecified page - that I must go and find - to determine the relative moisture/viscosity of the starter in the recipe; so that I can then adjust based on the consistency of my starter. If you are using a starter recipe as a base, then please just insert the page number. The author also did not state what kind of flour.

Now that I've been harsh, I have to say that the kneading directions are good. I generally do stretch and folds instead because I get much better results with a whole lot less effort. I made this bread twice to get out some kinks and provide a better set of instructions.

Let's Get to the Dough


I refined the recipe to do an autolyse and better elicit and deepen the taste of the whole wheat flour. I also added 67 percent more flour than in the original recipe because the consistency was unworkable, more of a batter than a dough, though, the recipe did say to add more as needed.

Autolyse
227g. starter
502g whole wheat flour
358g water

Mix well and cover. Let rest for 20 minutes.

Dough
12g salt
Autolyse mix after 20-30 minute rest

Mix, cover, and let rest for 30 minutes. I kneaded, but it was very wet and unmanageable; definitely not amenable to doing a stretch and fold. I kneaded for 10 minutes, let sit for 15 minutes, and kneaded again for 5 minutes. I felt like the bread from this dough would be terrible, so I went on with the day's plans instead of catering solely to the needs of the dough.

Rising Time Varies Greatly by Season


The first time I made this dough, it was in a cold mid-winter kitchen, so I was patient and allowed the dough to rise for 20 hours. That's hours of monitoring occasionally and second-guessing one's self. The second time I made this dough, it was also quite cold and I let it rise for 23 hours. It likely would have been seven hours on a May day when it stays at 65-70 degrees at night and warms up even to 80 degrees during the day. The recipe said three to four hours; maybe on a hot midsummer's day. But when you add 67 percent more flour, you are in the territory of moving from adjusting a recipe to creating a new recipe.

Both times, the dough remained wet, viscous, jiggly, and unamenable to manipulation. This was a dough that required prayer to whoever, maybe the bread gods, or G-d's bread angels, or just the universe.

Loaf Pan Because This Baby Has No Shape on its Own


How does one shape a wet blob that spreads instantly? That is what loaf pans were invented for. I spray mine, but definitely at least grease them.

Grease the loaf pan; as much as possible shape the dough and put it in the loaf pan. I cover with another loaf pan and I bake this way as well. It's also an easy, cheap way to generate the steam to bake bread without investing in a baking stone or a la cloche. Much less anxiety producing or dangerous than adding water or ice to a casserole pan when your oven is 500 degrees. Loaf pans work very nicely.

Oven Temperature Timing


Turn on oven to 500 degrees when dough is placed in loaf pan for its final rise. Let the dough sit covered - and allow the oven to heat - for an hour to an hour and fifteen minutes. [An alternative to covering the loaf pan with another loaf pan is the top of an oblong la cloche. One must preheat the top of the oblong la cloche when preheating the oven. I have done this many times and it works well.]

Prep for Oven and Baking


Sprinkle water over dough. Do slashes on the dough. Place loaf pan in oven and cover with another loaf pan.

This would be a fine dough for sprinkling sesame or flax seeds on top, but those are purely optional.

Baking

  • Bake at 500 degrees for 10 minutes.
  • At 10 minutes, decrease oven temperature to 450 degrees.
  • After 15 minutes, decrease oven temperature to 350 degrees. My bread took another 32 minutes.
  • Total baking time of 47 minutes.

Voila


Nice oven spring and solidly good taste. Was pretty sour due to long rising time.

Friday, January 31, 2020

Bread Number 98: Oatmeal Sandwich Bread

It is two years since I last wrote and I have been making bread almost every week, though not new breads. More on that hiatus in another post.

Bread 98 is light on the whole grains at about one third of the total flour, but it does have lots of oats and, every time I have made this dough, a very long rise, almost or up to 24 hours, that gives a nice mellow sour flavor that I love. I've baked this bread three times for us, and a few more times if you count breads to send home with a friend and one of my daughters. It is a crowd pleaser.

The autolyse takes no time to put together and, following that, the dough sits forever after two stretch and folds. Quite easy.

Total ingredients
175g whole wheat flour (125g for autolyse and 50g that go into the dough)
91g oats (I used fine oats that can be used to make a quick oatmeal)
313g water - only spring water, never tap water
100g starter
13g honey
20g milk
44g olive oil
325g bread flour
11g salt

Autolyse
See the glossary if you are not familiar with the term, but it's basically a short pre-soak phase for the flour, grain, and water. If I do an autolyse, I generally let the flour and any grains soak for approximately 30 minutes. A few minutes more or less will not ruin your dough, so no need to be super diligent on this.

125g whole wheat flour
91g oats (I used fine oats that can be used to make a quick oatmeal)
313g water - only spring water, never tap water

Be careful: Not all of the whole wheat flour goes into the autolyse. Mix well and let the mixture sit for 36 minutes.

Dough
Autolyse mixture
100g starter
50g whole wheat flour
13g honey
20g milk
44g olive oil
325g bread flour
11g salt

Mix the dough together until all of the liquid is absorbed and the flour is integrated. Let sit for 20 minutes.

Stretch and folds
1. At 20 minutes, do a little kneading, just for a minute, and then a stretch and fold.
2. Wait another 15-30 minutes, whatever is convenient, and do another stretch and fold. The dough should be firm.

Cover this dough with plastic instead of something else. It tends to dry out easily.

In a winter kitchen, I have let this dough rise for up to 24 hours. The last time, during some mild winter days and nights (nights of 45 degrees Fahrenheit and days of up to 60), the dough took about 19.5 hours, and to be honest, I could have let it sit for an hour more. It was a recent Sunday evening and I just felt like baking already.

Patience please


The dough hardly rose overnight even though the kitchen was relatively warm. I did sprinkle on some water and replace the insulated, almost shower-cap cover over the bowl because there was starting to be a dry patch on the dough. It seemed to work.

I did the dent test to make sure that the dough was ready, but honestly, I always feel that there's a leap of faith in the determination that it is time to shape the dough and do a final rise before baking. I have waited until a dough looks super puffy, even post-puffy, and the breads come out pretty good anyway. When the comparison is supermarket or even farmers market bread, these are still way better.

Shaping dough and baking


One hour before baking, preheat oven to 460 degrees.

I sprinkle water on the counter, which prevents the dough from sticking when shaping it. This time, I made the oatmeal bread in a loaf pan. I do spray the loaf pan at this point with non-stick spray, then placed the shaped dough in there so that it is about the same length as the pan. Cover with plastic, or in my case, with another pan. Just make sure that the covering will not permit the dough to dry out.

Let the dough sit for an hour to an hour and fifteen minutes. Many bakers do a dent test at this point, but, I confess, I generally do not.
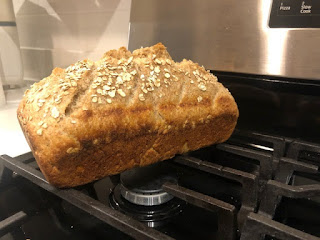

Another leap of faith and I put the dough in the oven, covered, of course. I used another loaf pan that fit right on top and this worked very well. One could use a dutch oven instead or a la cloche.

At 15 minutes, reduce the oven temperature to 440 degrees. Let the dough stay in the oven for another 25 minutes.

In a nutshell:
Preheat to 460 and bake at 460 for 15 minutes.
Reduce to 440 and bake for 25 minutes.
Total of 40 minutes in the oven.

Beautiful oven spring and excellent taste. A crowd pleaser.


Wednesday, January 18, 2017

Bread Number 95: 100% Whole Wheat Sandwich Bread

It is true that I am unable to follow anyone else's recipe except for my sister's challah recipe. Bread #95 bread is roughly the Reinhart recipe of a 100 percent whole wheat sandwich bread, but with the significant differences of using sourdough starter and changing the timing due to real-life needs to leave the house and to sleep occasionally. I've now made it twice and it had lovely oven spring each time. The first try was immediately frozen for offspring to eat healthy-bread-from-Mom.

I managed to make multiple breads for the offspring before they left the nest following their winter vacations. I have also discovered another local bread soulmate, who has furnished me with some challah recipes, one sourdough, and what looks like a nice rye.

Not a quick bread
This bread is at least a two-day affair because it involves a soaker, a biga, and running out to the store for yogurt when you find that you ran out. A biga is basically a dough-like pre-dough, more solid than a sponge, and a soaker allows flour to sit in a moistened state, with some salt, anywhere from overnight to a few days. This is similar to an autolyse, except for the much longer duration and the salt. I used a full-fat yogurt with part of the layer of cream that sits on top. It's also grass-fed and I am sure the happy cows were well brought up and were educated at highly-esteemed cow/cattle institutions of higher bovine learning. (You need to watch the early Portlandia episode to get that joke completely.)

Ingredients and instructions

Soaker
226g whole wheat flour
5g salt
198g yogurt (mine was not watery)

Mix well and do not add water, milk, or more yogurt until finished mixing. This pre-dough will appear dry, but do not worry, the liquid is most likely sufficient. Cover bowl after mixing and leave on counter. I left mine out for almost nine hours, but you have up to 24 according to Reinhart's recipe.

Biga
229g whole wheat flour
100g starter (mine is part whole wheat at this point)
160g water

Mix and cover. The instructions call for a prolonged refrigeration, but I wanted it to proceed that evening, so I only put it in the fridge for about five hours and then left it on the counter in a warm kitchen for another two.

Dough
Soaker
Biga
14g coconut oil - melted (Trust me, I did not melt it the first time and the second try went much better.)
10g honey
6g salt

I mixed and then let the dough sit for five minutes, at which point I kneaded for two minutes and did a stretch and fold. I have little patience for kneading. Perhaps I have to listen to better music or have something to watch on TV. I did three more stretch and folds at half hour intervals. Then, the hour being late, I covered the dough and put it in the fridge for 23 hours.

Baking preparation
FYI: This bread gets baked at a rather low temperature and takes relatively long to bake. Preheat the oven to only 425 degrees. I preheated with the oblong la cloche inside so that I could get a longer, thinner shape, though not nearly a baguette.

I also have been trying putting rice flour inside BEFORE preheating. This accomplishes two things, but heed the warning that follows.
1. Less heat loss when putting in dough.
2. Less time standing in front of hot oven.

BUT - here is the warning:
When opening the la cloche, stand back because the slightly baked or burnt rice flour can sometimes be smoky and cause your eyes to tear. This did not happen with the oven on this relatively low temperature, but I have experienced that when the oven is hotter.

Sprinkle the counter with rice flour. Right before baking, take the dough out of the fridge and shape into an oblong loaf on top of the rice flour counter area. This is very easy with a cold dough, plus the rice flour gives more anti-sticking protection for your dough. If you have ever been unable to get a dough out of a la cloche, a Dutch oven, or other contraption, you know what a desperate situation it is to look at a beautifully risen loaf and be afraid it will be ruined because it is stuck to whatever you baked it in.

Sprinkle the top of the dough with water. I did not use seeds on top, but go ahead, it would be great. Do a few slashes, maybe four or five, and then put that baby inside the la cloche or whatever and bake.

Baking and voila
After putting dough in, reduce oven temperature immediately to 350 degrees. Bake for 25 minutes and turn around la cloche. Do NOT open it. Let that hot air and steam stay inside. Total baking time 50 minutes. Perfect. I love it when I guess the timing exactly right. So proud.

Beautiful oven spring! Taste: Mixed voting here. I really like this one; it's a good basic bread either for sandwiches (because the yogurt softens the dough and makes the bread easy to cut) or for just some bread and butter. Perfectly lovely addition to the bread repertoire. However, a spoiled family member, whose tastes run to a strong preference for rye breads and now breads with rosemary (with a decided dislike for spelt), found this bread eh, as in average, okay, but definitely edible as he has managed to voluntarily eat it a number of times and without complaint.

Monday, January 2, 2017

Miraculous Remake: Bread Number 76 = Tons of Water + Anxiety

Now there are two proofs that a divine presence exists in the universe: (1) I have parallel parked (seldom, but it has happened), and (2) a glob of a dough turned into an amazing bread.

I remade bread #76 with changes, making it larger and with some fresh rosemary. I have been working for so long with my standard recipe, with slight variations, that I had forgotten what it is like to babysit a dough and not know when it will be ready. Felt like the parent of a newborn.

Autolyse
501g whole wheat flour
523g water

Mix, cover and let rest for 20 minutes.

Dough
autolyse
100g starter
1g fresh rosemary
11g salt
104 percent hydration makes for a dough, but a wet one.

Let rest for 20 minutes and tried to do two stretch and folds, each 20 minutes apart. Actually ended up kneading for about a minute each time. Let rest to rise, covered, of course.

Anxiety and time pressure
At 3.5 hours I did a slight mix/knead because some  liquid had pooled slightly around the edges. At 6.66 hours, the volume of the dough was looking good, much expanded, but not popping of  a few large bubbles - think pizza, not sponge or starter bubbles.

Math skills off: I thought I had nine hours to let dough rest, but I had only seven, and dough was being prepared for New Year's Eve dinner party for which husband was whipping up a storm of impressive appetizers, soup, and many dishes. On the plus side, the dough smells heavenly with the freshly ground wheat flour mixed in with the rosemary. Love that fresh rosemary right off the backyard plant. You have to love a plant that thrives without any maintenance whatsoever.

So, at 6.8 hours, did a stretch and fold, though not sure at 104 percent hydration, with wet hands and a goopy, though cohesive, dough, whether one can actually call what I did a stretch and fold.

Moving on blindly
Now we go into uncharted territory.

Toping ingredients:
rice flour
sesame seeds
ground flaxseed (not flaxseed meal)

Start with rice flour and sprinkle generously into a bowl. Rice flour is between you and sticky disaster of a dough that will not come out of the bowl. Then follow with sesame seeds and ground flaxseed. These will add to taste and look lovely. Cover bowl with plastic, beeswax, wet towel, or, in my case, a shower cap that gets reused a million times.

Promise myself NOT to touch dough for 1.25 hours.

Baking
Because dough is quite wet, I decide to use the Dutch oven.  AND sprinkle generously with rice flour before putting Dutch oven in the oven. Why? I have never tried this before. Usually I do my sprinkling, if any, of rice flour over a million-degree oven just before placing the dough inside and the Dutch oven gets particularly hot and scary. But I'm in an experimental, though anxious, mood. I know the rice flour will burn, but maybe it will work and save a good 30 seconds of accumulated heat when I plop that dough in the awesomely hot Dutch oven in an hour.

Preheat oven to 480 degrees with Dutch oven - and its rice flour - inside. Wait for an hour.

1. Grammatical tense agreement, as you see, has gone out the window.
2. More anxiety to follow.

I am anxious because I did the rice flour thing in the dough bowl instead of spraying or wiping it with oil. I could have put on sesame seeds and flaxseeds just before baking. Will the dough stick to the bowl like the gloopy mess it could be and not even make it into the oven? What was I thinking? And will the burned rice flour at the bottom of the Dutch oven ruin whatever chances of a good bread?

For the hour of anxiety I do KP duty and attempt to keep up with cleaning of bowls, measuring cups, and other accoutrements of husband's prolific cooking. This will end up making no difference as the next morning I clean up for three hours, which had been preceded by three minutes of wondering how to start and thoughts of never again having a clean kitchen. I must say that the water in the sink the next morning was about as dirty and greasy as an environmentally toxic disaster area. 

In theory
Experimentation, innovation, all wonderful  in theory, but not safe and when compared to the recipe followers of this world with their known outcomes and their accomplishments of set goals time after time, one can doubt. In fact, doubt is part of all creativity and seeking really. Certainty keeps one in the same hole. Enough philosophy; back to bread.

I was imagining a messy disaster and felt I was merely going through the motions to see how badly this bread would turn out. It was a mess of a dough - no shape. It could not be placed on the counter, shaped, slashes done on top. No, I plopped it, in the purest sense of the term, quite unglamorously into the bottom - really bottom corner, if a circular-shaped bottom can have  a corner - of the Dutch oven. I quickly sprinkled some more ground flaxseed and sesame seeds on top, put the top on the Dutch oven, and prayed, but only briefly because this was not going to turn out well.

Baking results - must peek
Baking time: 45 minutes at 480 degrees, the whole time covered with top of Dutch oven so could not peek.

OMG! Miracle! Show tunes practically blasting in the air, though only I am hearing them. A gorgeous, deep brown bread with perfectly sprinkled organic, artisanal stuff on top. This unattractive, unshapen dough was actually the ugly duckling of a later incredible Cinderella of a bread, a perfect dinner party ooh-it's-beautiful-and-delicious-amazing bread. Resorting to mixing fairy tale metaphors inappropriately. Cinderella was always beautiful; she just needed time off, nicer clothes, and definitely a shower.

Kept eating it the next few days as the husband enjoyed his frozen bagels over the winter break. More bread for me. Incredible and must make again. Perhaps anxiety was key ingredient.

Divine bread making spirit in the universe - only half kidding
Received so much more than I deserved unless bread deity believes, like me, that worrying produces good results. Perhaps a kindred spirit. Deity of bread making clearly was smiling upon me with favor. I felt blessed and relieved that dinner party bread did not turn out to be punishment for experimenting. Grace, gratitude, and selfishness.

Taste: Fantastic, amazing, great. Do not want to share.

Tuesday, December 27, 2016

Bread Number 93: Rosemary Is Name of the Game

OMG! I would put one gram of rosemary - about half a handful for my small hands - in every bread after this. What a flavor boost and such a nice aroma. Plus, the stuff grows totally wild even in the cold. Who knew? I was just experimenting and I am generally against all ingredients beyond the basics of flour, water, natural leavening culture, and salt, with the exception of caraway seeds, sesame seeds, or maybe flaxseed meal or wheat bran. 


I made this bread twice and it was a big hit both times. If it had not been for the gentle prodding not to overdo a good thing, I might never leave out rosemary again. Spectacular!

Ingredients and instructions for a  possibly three-day bread

Day 1 - Sponge
100g starter
210 to 220g water (I used more than 200 because my starter was stiff)
190 to 200g bread flour (same as the water, but used less when my starter had a relatively low moisture level)

Mix and cover. I usually leave out this sponge for eight hours in a warm kitchen. For a cool kitchen, in the high 50s to 60s Fahrenheit, I can go 10 to 12 hours, which equals to a whole work day. To truly get convenience, mix the sponge in the evening, put it in the fridge, and take it out to rest in the room temperature for an entire work day.

Day 2 - Dough
The sponge, having rested on the kitchen counter in the room temperature for eight to 12 hours, should be nice and bubbly, exuberant looking, in fact. When you see this, you have a window of an hour or two to complete the mixing of the dough, depending on how bubbly the sponge is and how warm the room is. I am always more careful in the hot weather, but this is a very friendly, flexible bread to make. Don't be anxious.

Dough
Leave sponge in its bowl and, in a separate bowl, mix the dry ingredients. When they are mixed thoroughly, add them to the sponge. Then it will be time to mix in the water.

50 to 75g farro flour
200 to 220 whole wheat flour
0 to 50g white flour
Make sure the flour adds up to 300g
11g salt
1g fresh rosemary, cut into 1/8 to 1/3 inch pieces and washed
102 to 115g water

With the flour mix, it depends on what I have in the house, how late it is, and whether I want a lighter or heavier bread.

Mix all of the dry ingredients, then put in them in the sponge. Add water and mix thoroughly, about five to 10 minutes by hand.

Then do four stretch and folds at 15 to 30-minute intervals. I write a checklist of 1-4 on a piece of paper so that I do not lose count. The dough should get progressively less fragile and more cohesive with each stretch. I am usually rushing or in the middle of other things, so I generally do 15 or 20 minutes.

Cover the dough bowl and refrigerate for 24 to 30 hours. I usually go for 24, but with a similar bread, I was not up for midnight baking, so I left it overnight and baked instead at 6 a.m. A routine, amazing bread resulted. I weighed late night baking against a 6 a.m. wakeup to fire up the oven.

Day 3 - Baking prep and oven time
What I take out to prepare for baking:
My super-hot-oven mitts
Lame (French name for a super-sharp instrument, but you can use a bread knife, for slashing lines in the dough before baking)
Tiny water bowl
Pastry brush
Food thermometer

Preheat oven to 500 degrees for one hour. I preheat with the baking stone and top of la cloche in the oven. These need to be very hot to be ready for the dough. I used the oblong la cloche the second time, which family members prefer, because they think (and they are correct) it is easier to cut an oblong bread than a boule. With the oblong la cloche, I preheat the oven with both the top and bottom.
 
I made the first one as a boule  and the second as an oblong bread. Either way, I quickly shaped the dough into either a round  or oblong mass, then sprinkled generously with water, and made a cross-slash on top of the middle of the dough.

For putting the dough actually into the oven, I either do it with wet hands and accept that the bottom of the dough will be a little imperfect, or I sprinkle rice flour onto a baking peel (also used for pizzas) and then slide the dough onto the baking stone. Then cover with top of la cloche. I have found that my breads do better this way than with the ice or water technique.

Rice flour
For the oblong breads, I ALWAYS put a thin layer of rice flour in the hot - be careful - bottom of the oblong la cloche. This will prevent sticking and it is so much more pleasant to slide the bread out when it is ready than to use a knife to wedge (is that a verb?) it out, hoping that you do not separate a chunk of the bread while doing so.

For the two versions I baked at 500 for 20 minutes, then reduced the temperature to 475. Total baking time was 45 minutes for the boule and 35 minutes for the oblong bread.

Thermometer
It is nice to have a food thermometer and know that the bread is done inside. I usually take it out at 195 to 203 degrees. Another factor is whether the thermometer probe is wet or gunky - a technical term - with moist dough when you pull it out. It gives me confidence because often breads appear on the outside to be done quite a while (even eight minutes) before they are ready inside.

Taste? Spectacular! The little bit of rosemary adds such a nice scent and taste. You will feel so professional and you might want to save this bread just for yourself. Let others have a share and smile when you get compliments.

Thursday, December 1, 2016

Bread Numbers 91 and 92: Breads of Affliction and Hope

I am an American who has spent much of the last few weeks in disbelief and sadness at the prospect of having a president who has unabashedly made racist, sexist, and otherwise bigoted statements. So after six months of making only old breads and not adding one item to the 108 project, I decided to make matzo, the bread of affliction, of liberation, and of hope, a bread that symbolizes that life is cyclical. A bit of inspiration at a dark time.

Online sources too
For bread #91, I roughly tried the Peter Reinhardt recipe from Whole Grain Breads. For bread #92, I took direction from recipes at a few different websites, some Jewish, some not, some "alternative," which for matzo means using any ingredient beyond water, flour, and salt, and which doesn't care about the 18-minute rule (explained below).

I grew up on the standard Passover matzos of Streits and Horomitz Margareten. Like cardboard right out of a box, but I loved it anyway, especially the whole wheat matzo, which remains my favorite.

Warning: Hebrew and Yiddish words are interspersed because they are so central to preparation and enjoyment of Passover, of which matzo is a central part.

Glossary
Matzo in Hebrew refers to unleavened bread, which is eaten during the eight-day holiday of Passover to commemorate each year the quick departure the Ancient Israelites made in getting out of Egypt. As the story goes, and the Biblical Hebrew raises as many questions as it answers, the Israelites took their dough, which had not yet been leavened or risen, and left. They baked the dough later (and I do not know whether it was a few hours or a day), producing what were called matzo cakes, though it is generally called, even in the original text, just matzo.

Now, in modern times, to get a kitchen - including the oven - ready for the holiday, one cleans out every cabinet and gets rid of all chametz, which is anything remotely bread-like or already opened prior to the holiday. Much, much more is involved, but a full explanation could - literally - take all day and full explanations can be debated endlessly.

Forget the 18 minutes - this time
I will not go into the laws of Passover, except for two. (1) According to rabbinic law, one of the key regulations governing the making of acceptable Passover matzo is that it must be made in 18 minutes, counting from the first second when water touches flour until putting the dough into the oven. This intimidated me no end. (2) You have to make the matzo in an oven that has been made ready - or kashered - for Passover.

Since it is not now Passover, I baked on my regular - or chametzdich - baking stone, which would definitely not be kosher for use during the holiday because I use it all year round for making bread. Don't ask questions; if you have observed this holiday for your entire life, you know that the special aspects of it are a fantastically clean house when the holiday begins and a week-long celebration of an alternate food reality that results in family bonding and merriment, if only for the matzo-haters to be screaming about how they cannot wait for the holiday to be over. I never had that problem.

Recipe for #91

113g whole wheat flour
2g salt
85g water

Preheat the oven to 350 degrees.


Mix and then divide dough into four small balls. Knead each ball for maybe one minute, until smooth, and let sit for three minutes. The clock is ticking. Knead each ball again for about 30 seconds. On a well-floured surface, roll out each ball separately. I put a little flour on each before rolling it out. The rolling out is easy and quick. Eighteen minutes for a small recipe should be no problem.

Reduce oven temperature to 325 degrees when placing dough in the oven. One baking stone will hold four pieces of rolled-out dough, with the possibility of a bit of overlap, which did not affect the final product at all. The recipe called for a half hour of baking, but mine was totally done at 23 minutes and might have been fine at 20. It was fine without dusting the baking stone or putting little fork holes in the dough, something I justified on the grounds that the Ancient Israelites did not have forks and actually I neglected to read that part of the recipe.

The matzo tasted great; it was crunchy and tasty, though maybe I will try a rye/wheat combination next time. Nothing to be afraid of here.

And then there was #92
The big difference between Breads #91 and #92 is in the baking, with significant changes in temperature and time. And one more difference in a key ingredient that is critical when embarking on anything new - patience. I was patient with bread #91 and more like Lucy and Ethel on the chocolate factory assembly line with bread #92.

For bread #92, I tried whole rye, then half rye, and finally I ended up with 100 percent whole wheat. I used the same proportions and amounts of flour, water, and salt. The whole rye was so sticky that it would not roll out. So I mixed it to make it half whole wheat flour and I put in the right amounts of more water and salt. 

By this time, the clock was ticking and not the 18-minute clock so much as the have-to-make-dinner clock. I still wanted to do a 100 percent whole wheat matzo following the rye. This is exactly the point where the patience ran out and I threw lots more regular flour on the counter, the rolling pin, my hands, and the rye/whole wheat dough. It was looking good in the rollout at first. I believe that with some patience, there would have been a nice matzo produced; but when that stickiness started and the clock showing the late hour, I chucked the dough in the garbage and proceeded directly to do the completely whole wheat version.

I had preheated the oven and the baking stone for one hour in a 500-degree oven. 

I quickly rolled out the whole wheat dough. I made it thin, but probably not as thin as bread #91 - all awry with the patience ebbing. I baked the dough for three minutes and it appeared beautiful, but the taste not so much. It was like a cross between a cracker and pita bread, therefore not satisfying as either.

Virtues can be a challenge

Even with an 18-minute rule in the back or forefront of one's mind - patience is a necessary virtue and practice in making even a quick flat bread.

Two good results: I know I can make matzo (will probably try a half rye again), and I did not think about politics at all.

Sunday, May 15, 2016

Bread Number 89: Whole Wheat, Farro, and Serious Procrastination

Here I am, no closer to actually starting the challah challenge than I was a year ago. All it takes to be ready is get out the ingredients and begin, but my wonderful family is actively opposed to the making of any but my traditional, tried and true challah. I can use that as an excuse, but I have plenty more, none of which amount to a hill of beans because I am perfectly capable of this. And now, on the cusp of a month on the road, I am devising a plan to involve people other than said family members, people who will be willing to act as taste testers.

As for the plan to make matzah, I have been reading and reading about it, discussing the derivation of the Hebrew word, and procrastinating. I might make it later today if I do not get sidetracked with packing.

Now for a nice combo: Whole wheat and farro is a fantastic combination.

Ingredients
50g farro flour
350g whole wheat flour
200g starter (all purpose flour and water at 100 percent hydration)
310g water
11g salt

All of the berries were ground into flour immediately prior to making the dough. The aroma is heavenly. 

Autolyse
Mix the water and flour. Cover and let sit for 30 minutes. 

Dough
Add starter to autolyse, mix part way, and then add the salt. Needed to use my hands to mix this dough thoroughly.

I did four stretch and folds, each 15 to 20 minutes apart. Then I let the dough sit, covered, in a warm - not hot - kitchen of about 74 degrees for seven hours.

Shaping and baking
Preheated the oven to 500 degrees with the oblong la cloche inside. I then shaped the dough into an oblong shape, but fatter and stubbier than a baguette. Covered and wrapped the dough in a facsimile of a couche with the beeswax covering instead of a real couche or plastic, though the beeswax material is hard to clean.

Did a one hour final rise. Put slashes across the top of the dough. Before plopping the dough into the dangerously hot la cloche, I sprinkled - liberally - rice flour on the bottom. I have had bad experience with dough sticking to the bottom and the sides of the oblong la cloche. The rice flour works like a charm. 

Plop dough into la cloche, cover, and close that oven door. Reduce temperature immediately to 480 degrees.

Next time, I will roll the dough in the rice flour as well because it stuck to the sides. I got out the dough with a knife, but, frankly, I almost burned myself, just missing touching the outside of the super hot la cloche. One should really heed the instructions one gives to one's children in these types of situations. I was lucky to have avoided a good burn.

Baking time: 30 minutes

Beautiful oven spring. Fantastic taste.

Thursday, March 24, 2016

Bread Number 88: Lovely Multiple of Four for My Group of Four Peaceable Writing Compatriots

It's 8:30 a.m. and I have a challah dough almost ready for braiding, a sponge sitting on the counter - made this morning - and the flour for that dough ground and protected in the freezer in a ziplock bag. I'll come home late this afternoon from the husband's minor surgery and finish that dough. The challah will be baked and cooling off by 10.

Just because I have not been working on this blog does not mean an absence of home-baked bread. I've been so busy with research and projects at work, so accustomed to and in the rhythm of making favorite breads, so procrastinating - oh yes - the upcoming challah challenge to finish up the 108, that writing here has taken a seat way back in the bus.

For you, my writing lady pals

From time to time during monthly dinners and writing critiques that are the rituals of the Blockheads, my writing group, I keep my pals up to date on the 108-bread project. They have been known to bite into and enjoy the fruits of this quest. About a month ago, they laid down a challenge. That challenge was to make a bread dedicated to them, a bread especially for them. But of course.

Four of us and 88 the next number - kismet. I would make a bread with four kinds of grains and two kinds of seeds and enjoy the mathematical loveliness of the number 88. Perhaps something took exactly 11 minutes along the way. Really not sure.

I bought whole wheat, rye, spelt, and farro berries, which can be used to make food other than bread, though I have not yet tried any of those. I made my usual sponge, described below, used my flour mill machine (a piece of genius), and mixed up a dough with a wonderful aroma. I added caraway and sesame seeds. Next to my much-loved rye bread, I think this one is my favorite. And I am so glad that my writing pals supplied the idea. I dedicate this bread to them.

To Rose, Jill, and Franca: Women whose writing I always look forward to reading, whose company I enjoy, and whose analyses give food for thought. 

This post is long overdue. I did the first try of bread #88 back in February and a second try three weeks ago. This is the recipe for the second try, which turned out to be a super delicious bread, at least to my happy taste buds.

Ingredients

Sponge
100g starter (100 percent hydration)

200g water
200g bread flour

I let the sponge rest for 10.5 hours in the kitchen.

Dough
150g whole wheat flour
84g spelt flour
40g rye flour
26g farro flour
11g salt
4g sesame seeds (plus more for the top of dough when baking)
4g caraway seeds (plus more for the top of dough when baking)

All of the whole-grain flours were freshly milled by my brilliant German flour milling machine.

Stretch and folds and resting

Yes, I've become blase, I do things somewhat by rote, but that's because I've succeeded already in this 108-bread quest. I've learned so much that I'm not thinking,pondering, considering every move. I've discovered good moves that work well and just need monitoring.

Usually I do four stretch and folds, each separated by 15 to 30 minutes. This time I did three. The dough was ready; it had a decent amount of rye and spelt, which do not seem to require as much manipulation. Sometimes the best instinct is to stop. I did three stretch and folds at 20 minutes apart. I slightly and quickly shaped the dough.

I put the dough bowl, covered, in the fridge for 24 hours. When I put the dough there, it was almost 7:30, a perfect time to bake the next evening. 

Baking with rye and spelt

I did not go super high on the oven temperature here because of the rye and spelt, which, I've read and observed on breadtopia videos, do well significantly below 500 degrees. I preheated the oven - with the baking stone and top of la cloche inside - at 480 degrees. 

I shaped the dough, sprinkled on some water, and then sprinkled more sesame and caraway seeds on top. I also made an X-slash on top. I admit that I have not gotten at all creative on that part.

Upon putting the dough in the oven, I turned down the temperature to 460 degrees. At 15 minutes in, I turned it down further, to 440 degrees. I turned it off completely at 37 minutes. (That's a result of a previous mistake that ended up being spectacular.)

Total baking time: 42 minutes.
Taste: Fantastic. One of my favorites. Everyone seemed to like it. 

End note: I have to get back to putting in photographs. I miss the visual element. I like looking at bread and slices photos.

Wednesday, January 27, 2016

Bread Number 81: A Tasty Variation

The variation on Bread #81 is a stretch on the term variation because I changed quite a bit from the original recipe. This is a delicious whole wheat and requires no sponge phase. I did do an autolyse, partly because it's an easy way to build strength in a wet dough. This bread also fits with the whole wheat theme of my last couple of breads. Because this bread turned out so well, it is worth its own blog post.

The only reason I did not bother with a sponge was pure laziness. We enjoyed the winter storm festivities of gathering with neighbors for long dinners, watching two feet of snow accumulate, doing some artwork, and my solitary snowstorm accomplishment of binge watching a season of Girls. (Yes, the characters are spoiled and self-absorbed, but I love watching shows about New York, particularly Brooklyn, and it's well written. I thought the disrespect toward Iowa was a bit much.)

So there I was on a Sunday morning without any dough. 

Autolyse
553g whole wheat flour - freshly milled
528g water

Mix, cover, and let sit for 25 minutes. Incredible how quickly just the two ingredients combined and rested magically become so dough-like.

Dough
Add to autolyse:
100g starter 
12g salt

Hydration percentage: 96 percent

I did two stretch and folds, each 40 minutes apart. Be careful, the dough is slippery and extra stretchy due to its high hydration percentage. I let the dough rise in a 70-degree closet (my little warm spot in the house) and then put it in the fridge for seven hours. No bread on Sunday, but it was ready on Monday. Love DC because with two feet of snow over the weekend, no one was going anywhere on Monday and we had fresh bread.

Baking preparation
Preheat oven to 470 degrees for one hour with dutch oven inside. Sprinkle rice flour onto the bottom of the very hot dutch oven. Shape dough, though it will not hold a shape due to its wetness. Slash the top a few times. Not sure how well a pretty slash design would work, though it might if you get that dough very quickly into a hot oven.

Baking time: 52 minutes
Taste: Absolutely wonderful 

Next try: Shape the dough on a wet surface and with wet hands because - you got it - it's a wet dough.

Tuesday, January 26, 2016

Bread Numbers 86 and 87: Lovely Whole Wheat

Splendid whole wheat breads, each 50 to 60 percent whole wheat. These are impressive in their superiority to any bakery bread. Indeed there's no reasons other than variety or getting out of the house to eat anything other than a fine whole wheat bread with butter for breakfast. Super yummy, and that is a technical term.

Breads #86 and 87 had my usual sponge, with no whole grain flour. The doughs, however, featured whole wheat flour and seeds. My suspicion is confirmed that the household members will eat anything with caraway seeds and declare it delicious. Sesame seeds do not produce the same exuberant response, though I really like them.

Same sponge for breads #86 and 87
100g starter
200g water
200g bread flour

Mix, cover, and leave out overnight or all day for eight to 10 hours. Never misses and produces a bubbly beauty of a sponge.

The dough, indeed, the whole process for these two breads is so close as to be a mistake not to consider them refinements of one bread. But the whole matter of what constitutes a different bread is rather arbitrary.

Dough
Bread #86 will be listed first, then a comma, and then amount of the ingredient for bread #87. For some significant ingredients, the amounts were the same for both breads.

303g whole wheat flour - freshly milled and smelling so lovely in an early-morning kitchen
128g, 113g water
12g, 10g salt
4g sesame seeds
0g, 6g caraway seeds

Mix, cover, and do four stretch and folds, each 15 to 30 minutes apart. Let rise on counter. 

I then put each dough in the fridge for about 24 hours, and baked right from the fridge.

Baking preparation
Preheat oven to 470 degrees for one hour with a dutch oven inside. Shaped the dough, sprinkled with water, and sprinkled with caraway (only bread #87) and sesame seeds. Before plopping the dough in the dutch oven, I also sprinkle the whole bottom with rice flour to prevent the dough from sticking.

Baking time: 56 minutes
Gorgeous oven spring
Taste: Great for bread #87 and okay for bread #86

Bread Numbers 84 and 85: Barley, a Nice Nutty Minor Player

Two sour breads with quite long rises and about 20 to 30 percent barley flour, freshly milled. Not sure if the taste is different with freshly milled flour or whether the aroma in the kitchen after I grind up the flour makes me think the taste is better. Also, and this could be completely unrelated (not to mention that grammar police would not be pleased with a sentence that begins "Also, and"), but the breads I've made since milling my own whole grain flours have taken considerably longer time to reach a full rise.

I'll give both recipes below, one primarily whole wheat and the other about half bread flour. One caveat: I really liked the sour taste, but others in the household (well, one other, in particular) were not as pleased. For me, a long, slow rise is something to be thankful for and appreciate. But it is not a typical bread flavor. 

Bread #84
This bread had barley, rye, and caraway seeds. It was approximately 30 percent freshly milled whole grain flour. I did a sponge phase overnight and then let the final dough rise the next night. 

Sponge
101g starter
200g water
200g bread flour

This sponge is a regular for me. It is easy to mix together and it becomes a bubbly sponge either overnight or during a work day. I use it for all kinds of breads. I mix well, cover, and leave out on the counter, this time for almost 10 hours.

Dough
Add to sponge:
64g rye flour
115g barley flour 
Both of the above were freshly milled
121g bread flour
8g caraway seeds
12g salt
126g water

Mix well, cover, and do four stretch and folds within the first two hours. I did mine about 25 to 30 minutes apart, but I've also done 15 minutes apart when I've been in a rush. It all works fine.

Left the dough covered and on the counter for 10.5 hours. 

I then put the dough in the fridge for nine hours, but I would feel comfortable leaving it for up to 24 hours.

Baking preparation
Preheated oven to 450 degrees for one hour with the top of the la cloche on the baking stone. Big oops in that I might have cracked the oven door. Not sure. Maybe that was another baking episode or not even my fault. It's not a spring chicken anyway.

Oven time: 51 minutes, the last three uncovered.
Taste: Wonderful

Bread #85
A one-stage dough with mostly freshly milled whole grain flour. I should be wearing Birkenstocks and a cotton granny dress. I used a decently large amount of starter to account for the cooler, winter temperature in the kitchen.

400g water
100g starter
82g barley flour
410g whole wheat flour
11g salt

Love the smell of the barley flour right after it is ground. It has a combination of a hint of chocolate and baking pie dough aromas. I mixed and covered the dough. I did two stretch and folds, the first at 30 minutes and the second 40 minutes after the first. I had to be quite gentle because the dough was starting to break. 

I let the dough rise for 27 hours - yes, for more than a whole day and night - though it was in a 63-degree room for part of that time. I then put the dough in the refrigerator for five hours.

Baking preparation
Preheat the oven for one hour at 470 degrees with the dutch oven inside. Baking time only 47 minutes, maybe because it was not the most impressive oven spring.

I was nervous about this one because the dough was breaking easily. Maybe I let it rise for too long. But the taste was really good and super sour. Worth trying again.


Friday, December 18, 2015

Bread Number 83: Am I Making Almost the Same Breads Over and Over? Yes

I have never sought out a career that demands travel. A few widely-spaced trips a year, fine. But for several months it felt like I was constantly out of town. I was not quite, but too much in terms of getting into a rhythm for bread baking. A whole week at home for Christmas week will revive me. Then, perhaps another trip in January.

Bread #83 was a rye with a little whole wheat flour mixed in because I had very few wheat berries left. Now it's time to reorder, but I haven't caught up with all manner of things at home after the last trips, those to beautiful Colorado, friendly Texas, and dynamic Alabama.

The nice part about baking for so long is that even off my game I have standard go-to formulas. This means I can whip up a dough and I feel confident without paying too much attention. Not how I generally like to proceed - fan of mindfulness and all that -  but there is other stuff in my life besides bread. 

Ingredients
200g starter (made with white flour)
290g water
38g whole wheat flour
141g rye flour
271g bread flour
8g caraway seeds
11g salt

I used a lot of starter because my jar was pretty full. Plus, I initially planned for an overnight rise at a kitchen temperature of 70 degrees. Turned out to be 65 and I left the dough out half a day more. It helped to have a person at home who could put the dough in the fridge, not a luxury one has with a regular commuter lifestyle.

Instructions
Mix all ingredients well and cover. I did two stretch and folds, each 30 minutes apart. Then I let the dough rise on the counter for 14 hours. Next, in the fridge for six hours.

Despite not much fridge time - I  usually wait for 24 hours of fridge time - I decided to bake. 

Preheat oven for one hour with dutch oven inside at 470 degrees. 

Just  before baking, take dough out of fridge. Shape, do the slash on top, and sprinkle with water. Don't forget to sprinkle some rice flour into the dutch oven before plopping dough in there.

I forgot, but I got lucky. No sticking of dough to dutch oven bottom.

Baking time: 53 minutes, the last five uncovered. Beautiful oven spring. Nice solid go-to bread taste. Nice to have a great bread be normal.

Second try

I left out the whole wheat flour because I have not gotten to the wheat berry purchase yet. I am buying food storage containers to store them and the order for wheat and rye berries should be made today. I accounted for the lack of whole wheat flour by increasing the bread flour amount to 339 grams.

This time the dough took 18 hours for the first rise, followed by 11 hours in the fridge. Lovely, lovely oven spring and a great taste. A nice rye is always a winner in this household.

Wednesday, October 7, 2015

Bread Number 81: Many Tries to a Solid Whole Wheat

For the last two months, in between travels, in between artwork, in between studies and work, I kept returning to the quest for a perfect whole wheat bread - or at least one I really, really like so much that I want to keep eating it - and making it.

I've been playing around with high hydration percentages, in the 90 to 100 percent range. I finally added stretch and folds, an autolyse phase, and a fridge-to-oven strategy. I also ground the flour in my nice flour mill (thank you German engineering), which lends a nice aromatic - in a good way - to the dough-making process.

A small money wrench in this game of trial and error was that I started playing around with this bread in the high heat of summer, so I was using very little starter, thereby allowing for a long first rise period of fermentation. Making the bread again in the autumn meant that the length of time for fermentation went from long to extremely long.

Dancing allowed in the kitchen
I practically danced this time when I opened the dutch oven and saw a beautiful oven spring and a pretty bread. Success - tasty slices of bread that I ate for breakfast, smeared with butter, this morning.

Now, perhaps, after months away, I will return to the bread forums I used to peruse and participate in. I have gotten so involved in my artwork and studies that bread has taken a back seat. I also feel like I have accomplished much, though not all, of what I set out to learn and do when I picked that high number of 108 and began to make 108 different kinds of bread, arbitrarily determined, of course.

Now for that lovely whole wheat. I will only give the information for the last try of this bread as it was the only satisfactory result achieved.

Ingredients
574g water
41g starter (60 percent hydration)
597g whole wheat flour
12g salt

Instructions 
Make sure to wake up your starter. I forgot the morning before, which meant my starter was not quite ready when I mixed the dough the next morning, probably adding to what ended up being an even longer first rise (more on that to follow).

Ground the whole wheat flour - about 200 grams of whole wheat flour per 1 cup of wheat berries. Good to have a benchmark because I hate milling too much more than I use.

Autolyse - Mixed the flour and water. Slow process because I was listening to an interesting radio program. Covered and left for 30 minutes. Cleaned up kitchen. This also allowed the starter to warm up for a while more.

Mixed dough - Added starter and salt to the autolyse. Mixed well and covered.

Stretch and folds - Did two stretch and folds, one at 40 minutes and the second at another 25 minutes, just before going out to breakfast on Sunday morning (carefully timed before the farmers market and the yoga class - what a stereotype, except I do not wear Birkenstocks or much fleece).

Tick, tock
That fermentation period of the first rise ended up being 21.33 hours, during which time I left the dough in nice warm rooms, followed by leaving it out overnight in a cool kitchen of approximately 68 degrees. That's cool for me. (I'm freezing when it's 65 degrees in the house.) Not a winter kitchen, which stops fermentation, but definitely slowing down the process.

Indeed, before leaving the dough out overnight I had pretty much given up on it. I had no idea it would blossom after several more hours. The dough was exuberant, bubbles practically popping in front of me, on Monday morning. Big smile first thing in the morning when I peeked. Work beckoned, so I put the dough in the fridge. 

15 hours later
After work and after an evening event, a full 15 hours after I put the dough in the fridge, the dough went in the oven. I had actually planned. That morning, I put the dutch oven in the oven and I left a note for someone to preheat the oven at 8 p.m. to 470 degrees. After the one-hour preheat, I threw some rice flour in the hot dutch oven (to prevent the dough from sticking), I shaped the dough, did a cross-slash, and plopped that dough right into the dutch oven. Quickly covered it.

Doing nothing can be the best strategy No stretch and fold. No final rise on the counter. Straight into the oven after shaping. Indeed, this time around the bread turned out so much better than on previous tries when I let the dough sit on the counter (covered, of course) for a rest period and then a final rise of an hour.

Baking took 53 minutes. Lovely oven spring. Wonderful taste the next morning. 

So happy. Time to order more wheat berries and this is definitely a bread to add to the basic repertoire.